A man must have a workshop. Especially if you're going to be doing a lot of DIY and building stuff.
One of the outbuildings adjoining the house was certainly big enough, and once we had cleared out the thirty years' worth of junk which had been stored there, I was able to install my workbench, drill press, radial arm saw, and some shelving. The building was originally a byre, and the floor is just hard-packed earth. It proved to be fine for use as a workshop, with a couple of exceptions. Firstly, due to the damp conditions, a lot of my tools sadly developed a surface coating of rust, despite spraying them with WD-40 (quite amazing stuff, that). Secondly, during the winter, it was too cold in there to be able to work on anything.
Now LSS had given me a propane space heater for my birthday several years ago; this was used quite a lot in the UK when I was rebuilding my Land Rover. Unfortunately when I connected it up here, I found that the thermocouple had expired. In other words, it would only function if you kept the ignition button depressed. Spares proved to be unavailable, so instead of spending money on another model, I decided to build myself a woodburning stove. Having found an old electric hot water cylinder in one of the barns at the aged FIL's place, I decided to convert this into a wood burner. The advantage of using an electric hot water cylinder is that the walls are fairly thick, which is useful if you're going to burn wood in it!
The first job was to remove the external shell, and then scrape off the polystyrene insulation. Once this had been removed, I re-fitted the brackets (the cylinder was originally designed to be used horizontally).

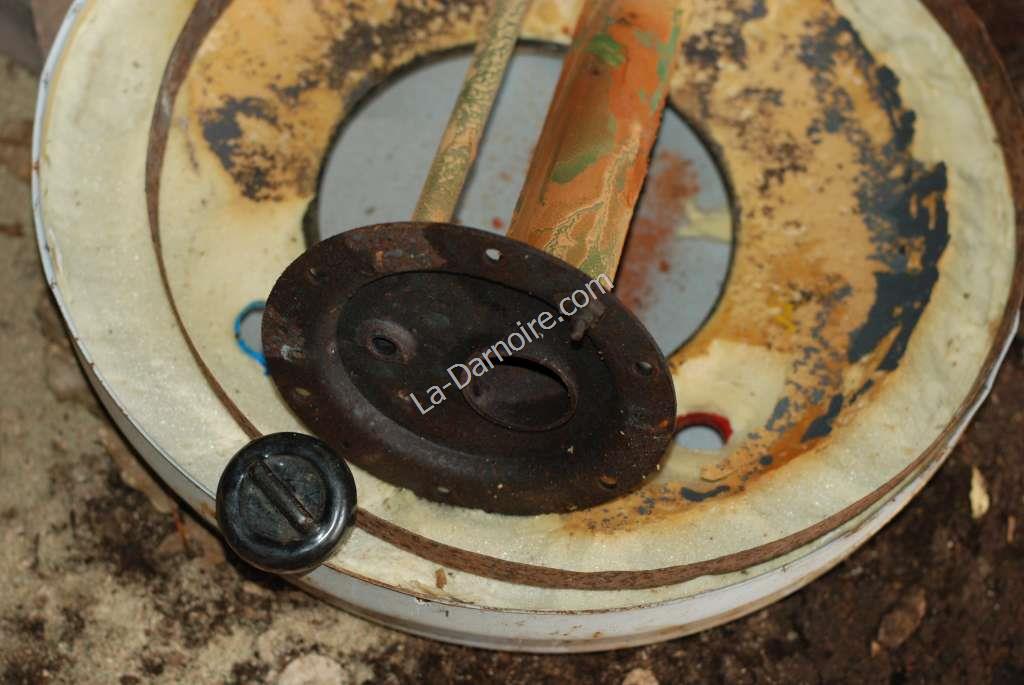
The next step was to remove the top of the cylinder. This was done by means of an angle grinder, cutting along the welded seam. I also removed the heating element and thermostat. The top of the cylinder will become the door of the wood stove. The larger hole left by the heating element will be closed with a small piece of glass so that the status of the fire can be checked, and the smaller hole left by the thermostat will be closed up. To provide a regulated airflow to the diy woodstove I will install a screw-type ceramic air vent taken from a small scrap woodstove (it was originally in the lounge but fell to pieces when we tried to move it! I kept the door latch for re-use, but the rest of the stove went on the scrap metal pile).
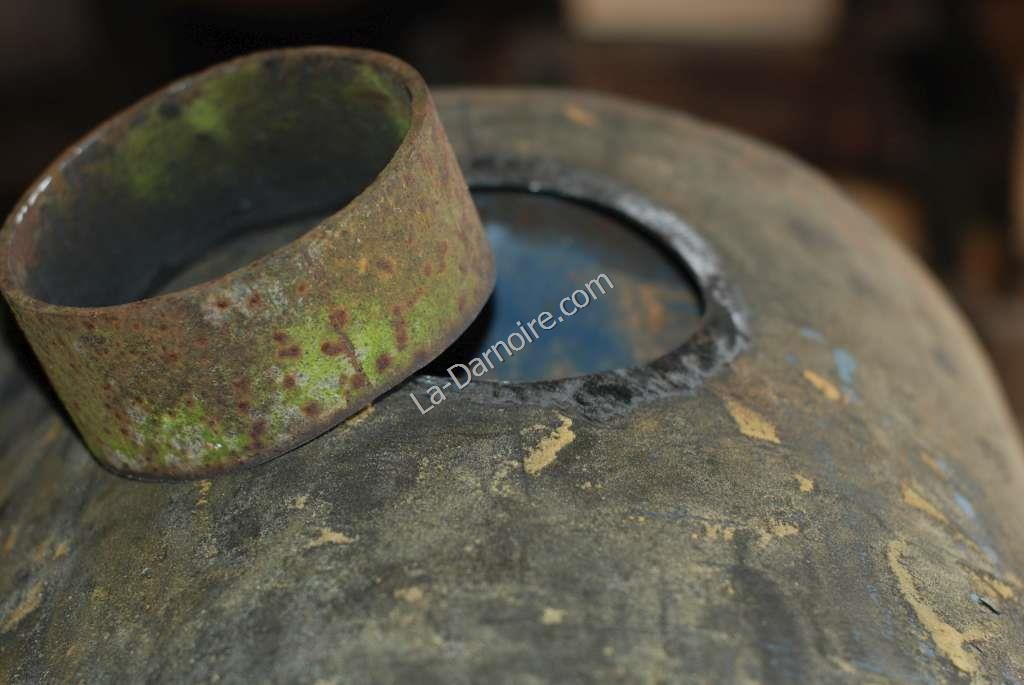
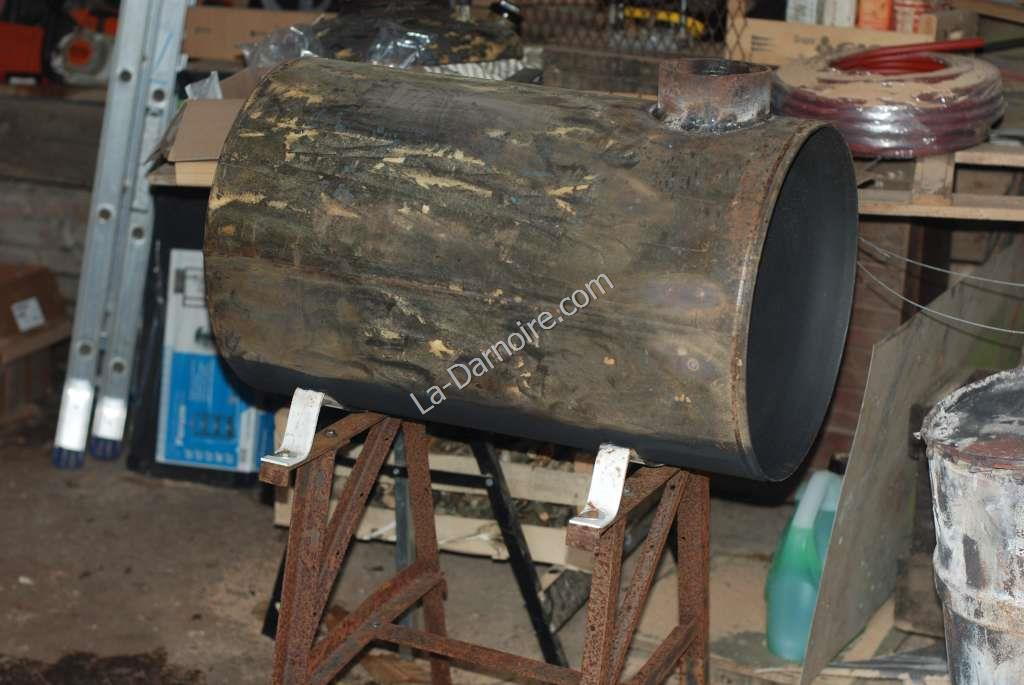
Now for the stovepipe collar. I found an offcut of steel drainpipe in the aged FIL's shed which co-incidentally was the correct size for some pieces of 100mm stovepipe which he also had lying around. I cut a suitably-sized hole in what will be the upper rear surface of the woodstove with the angle grinder. I achieved this by cutting several slots in a radial pattern and gradually removing more and more metal. The steel tubular section was then welded in place.
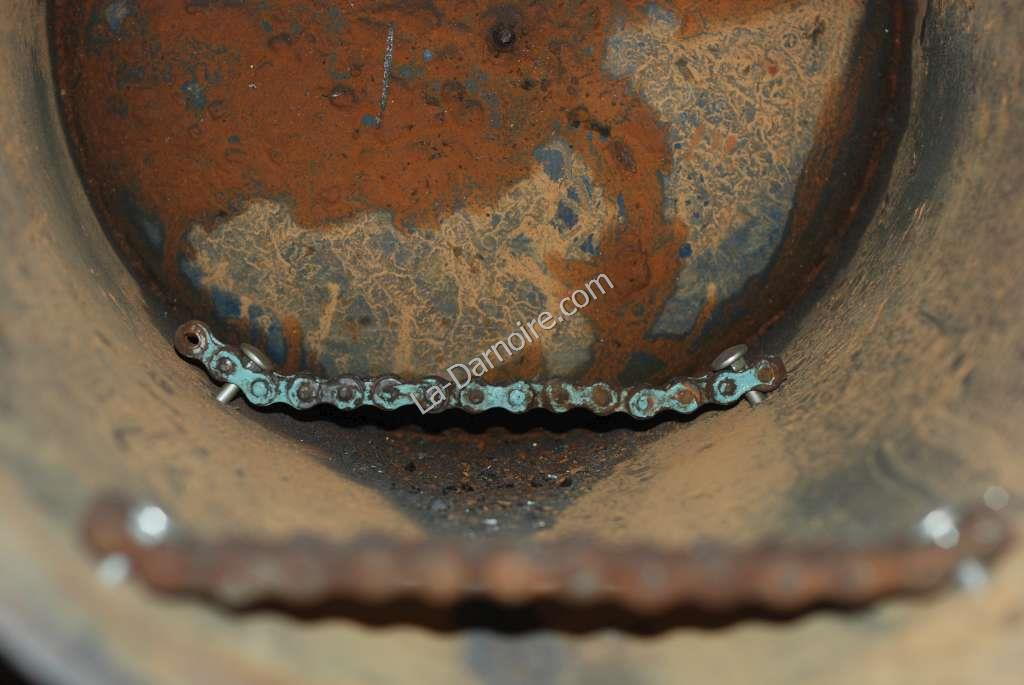
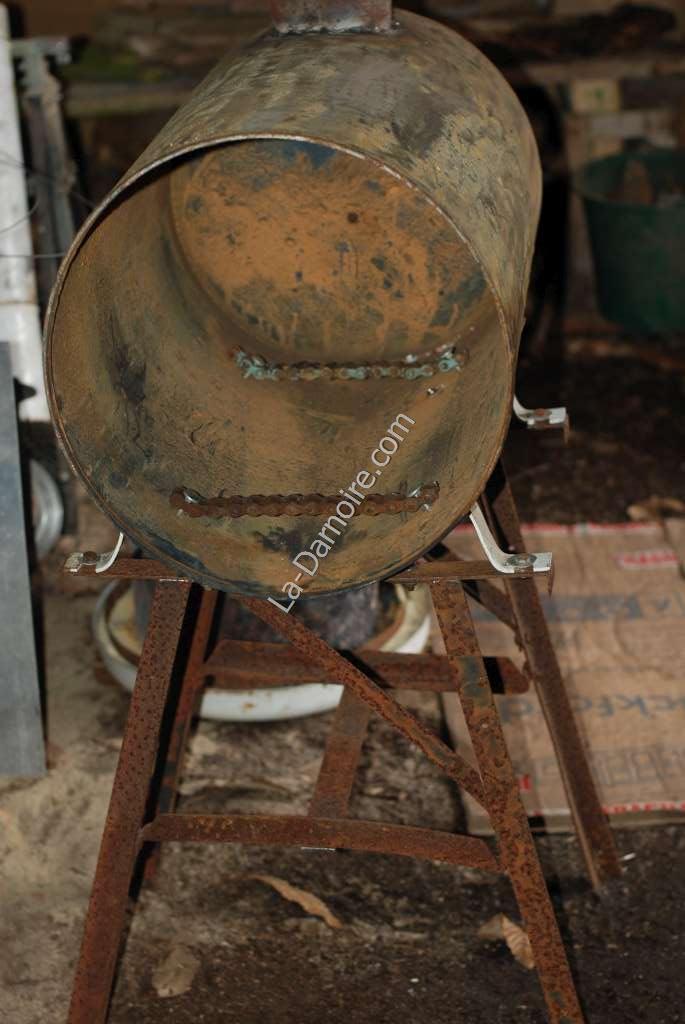
Using the bolts for the support brackets (which protrude into the woodstove), I installed the supports for the fire grate. In the scrap pile I had found some heavy-duty chain, similar to a motorcycle drive chain but with larger links. I bolted two sections of this in place at the bottom of the cylinder. A piece of heavy-duty wire mesh will rest on these supports, allowing air to flow through underneath the coals.
The diy woodburning stove obviously can't be used on the ground; it needs some sort of stand. The scrap pile provided some pieces of angle-iron which had been bolted together to support some long-gone piece of equipment, and by adding a couple of cross-pieces cut from the support brackets of an old barn door, I had a frame which was just the right height!
Two coats of high-temperature stove paint were then applied.
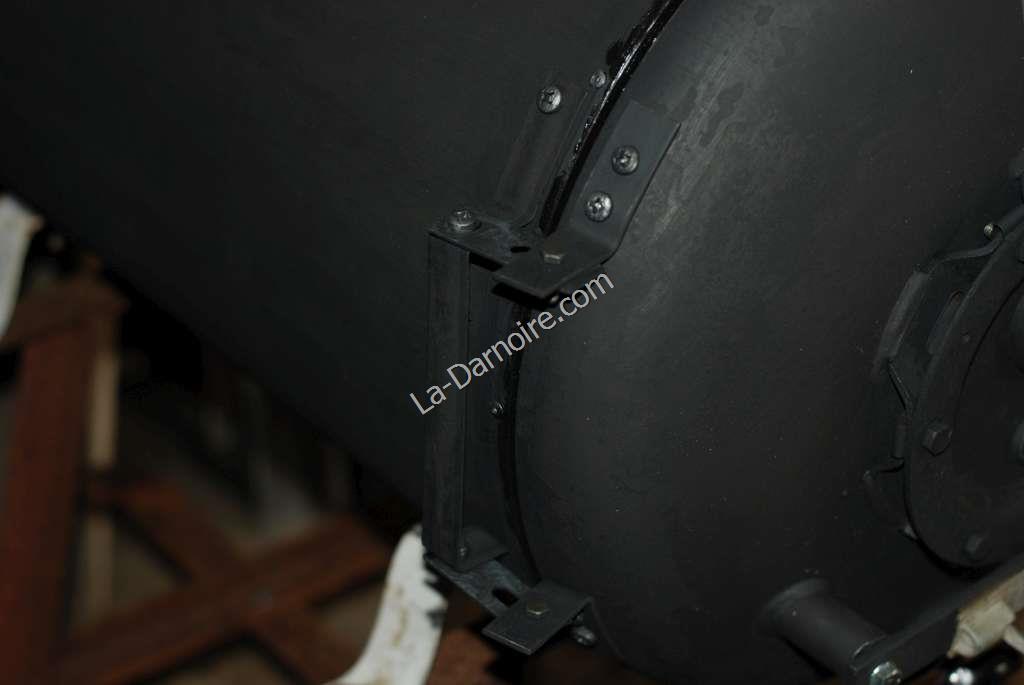
Now for the door. This took some planning, because a dome-shaped door is not the ideal shape for flat hinges! I ended up fixing small brackets to both the door and the cylinder walls, and using two small steel strips to form the actual hinge. Not easy to describe, but you can see what I did in the next photo:
The door needed to close with some sort of seal. This meant it needed some sort of "lip" around the woodstove body. To form this, I used an appropriately-sized band of steel from an old oak barrel. This was fixed to the body of the woodstove with rivets. I then made a door handle by taking a carrying handle off an old wooden trunk, and bolting this to a metal bar on the door. You can see the ceramic airvent control underneath, and the glass viewing window above the handle.

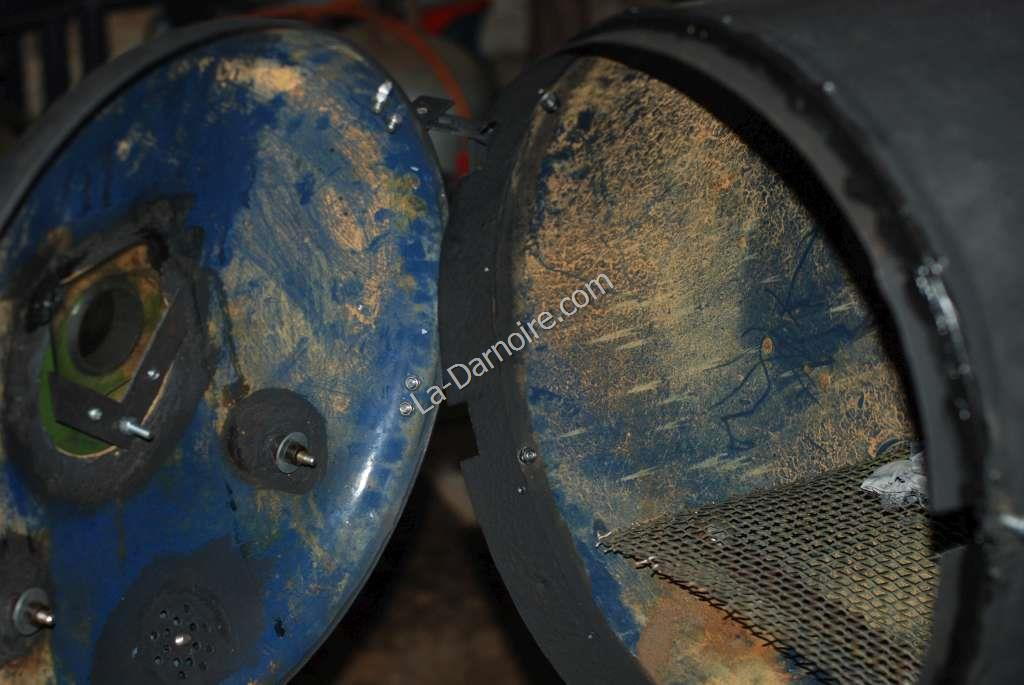
In the next photo you can see the inside of the stove door. The glass viewing window is held loosely in place with a small right-angled bracket. This allows the glass to expand and contract without breaking.
I drilled lots of small holes for the air vent (bottom left).
You can also see the mesh fire grate inside the woodstove, and the riveted "lip" around the woodstove body.
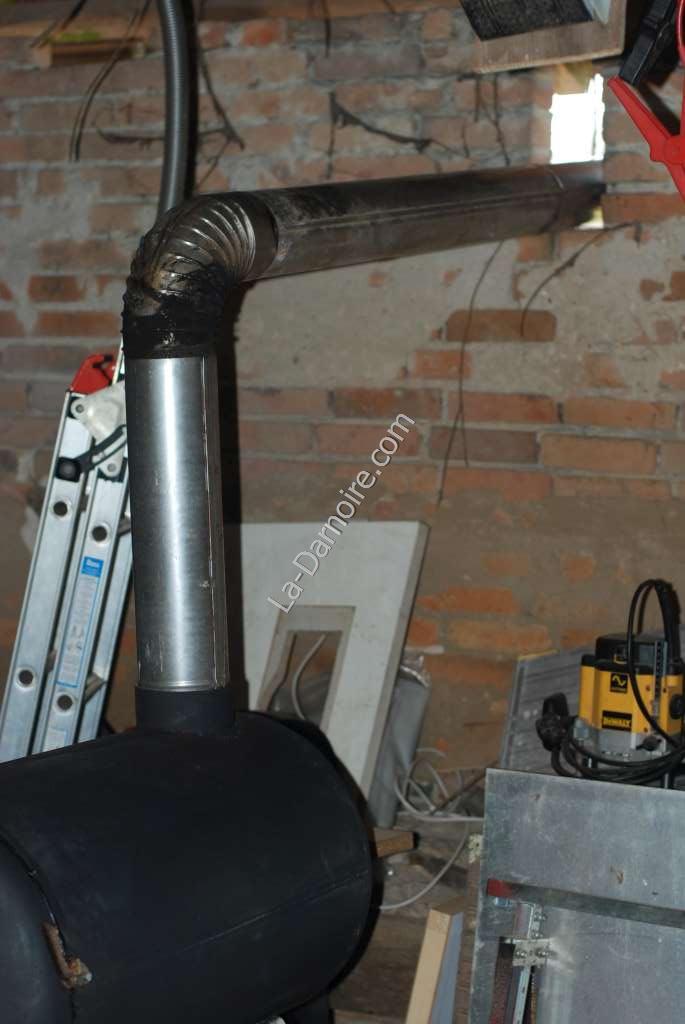
Here's a view of the completed diy woodburner with attached stovepipe. I didn't bother doing anything fancy, I just poked the stovepipe out of a convenient aperture in the wall!
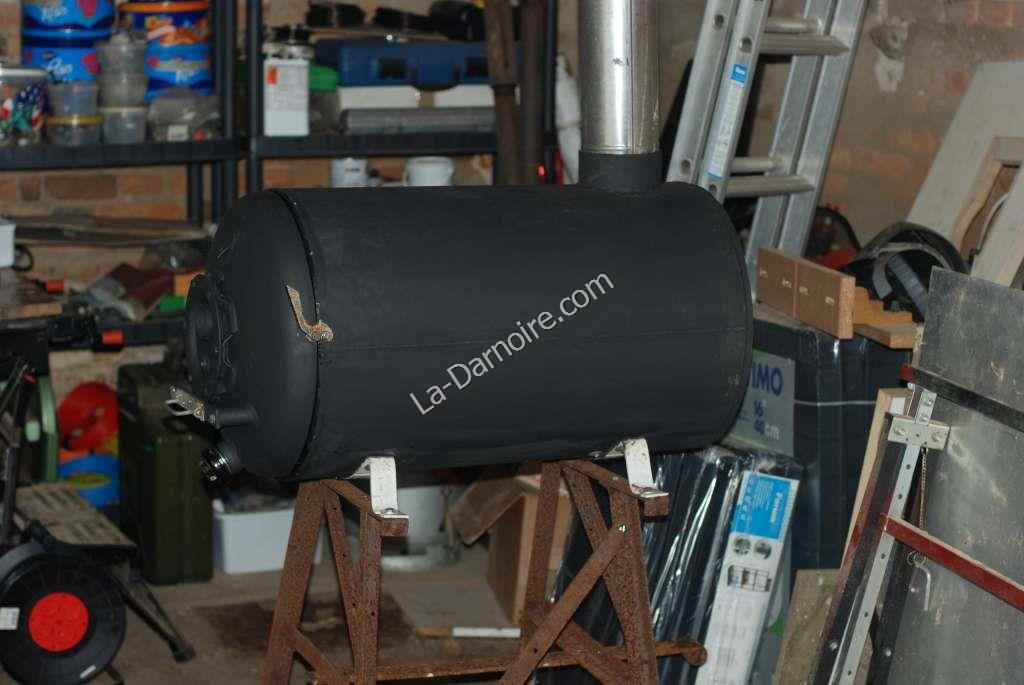
Another view of the completed woodstove showing the door latch. It latches onto a simple M8 bolt fitted to the side of the woodstove body.
So, does it work? I can confirm it does. It will take logs up to 50cm long quite comfortably. The only design flaw is with the air control. The 5mm holes I drilled underneath the ceramic air-vent are insufficient even with the vent fully open. For the time being, I just leave the door open a crack; this works fine - I've had no problem with smoke escaping. Ideally I think it needs two unrestricted air vents, but I'll revisit this problem at a later date.
The glass viewing window works fine; and because it's at the front of the stove the glass doesn't get too hot. The stove itself puts out quite a lot of heat, but one job I still need to do is insulate the workshop ceiling!