How we were going to treat the waste water from the house had been considered and researched even before we left the UK. La Darnoire is obviously not on a mains sewer system! In the past, used water from the kitchen sink simply exited through the kitchen wall via a lead pipe. That was the sum total of the waste water treatment. No wonder the foundation bricks had simply crumbled apart.
A reedbed is an ecologically-friendly way of treating grey water. Put simply, a reedbed is a large container filled with gravel, in which reeds are planted. Grey water is put in at one end of the container, and the reeds thrive in the wet conditions. Oxygen from the atmosphere is transported by the reeds to their root system, where it is made available for bacteria. These bacteria feed on (and thus remove) the impurities in the grey water. And the cleaned water is then removed from the other end of the container.
There are two main types of greywater reedbed; vertical, and horizontal. Due to the nature of the terrain - which was nearly flat - we had no option but to choose the horizontal type. I surveyed the site, measuring the levels by using a simple laser spirit level, a wooden stick, and a measuring tape, and transferred these measurements onto a sketch map. The aged FIL had an old theodolite, but although I do know how to use one I decided I didn't need millimetric precision.
The height difference between the soil surface level at the house and that at the pond was 1 metre. As the reedbed will be 60cm deep, this left only 40cm available for the "fall" of the underground pipes over a distance of 40 metres. This created a problem later on, which I'll mention at the end of this page. The best location for our water-treatment plant was calculated to be as close to the pond as possible, yet without interfering with the roots of the old pear tree.
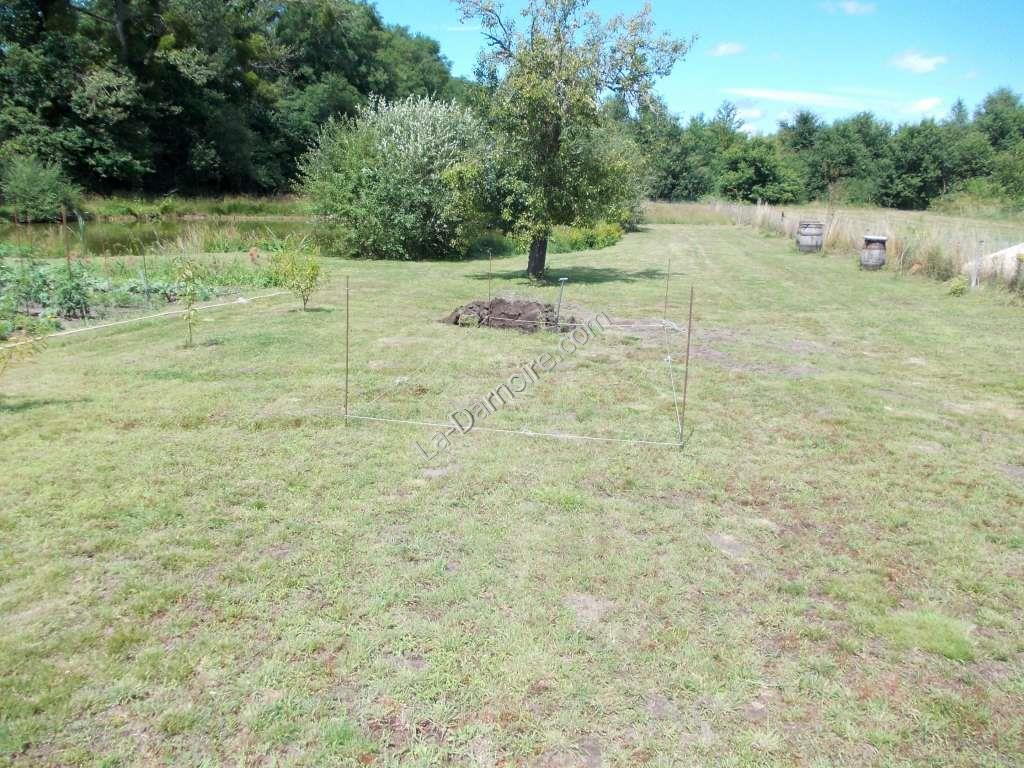
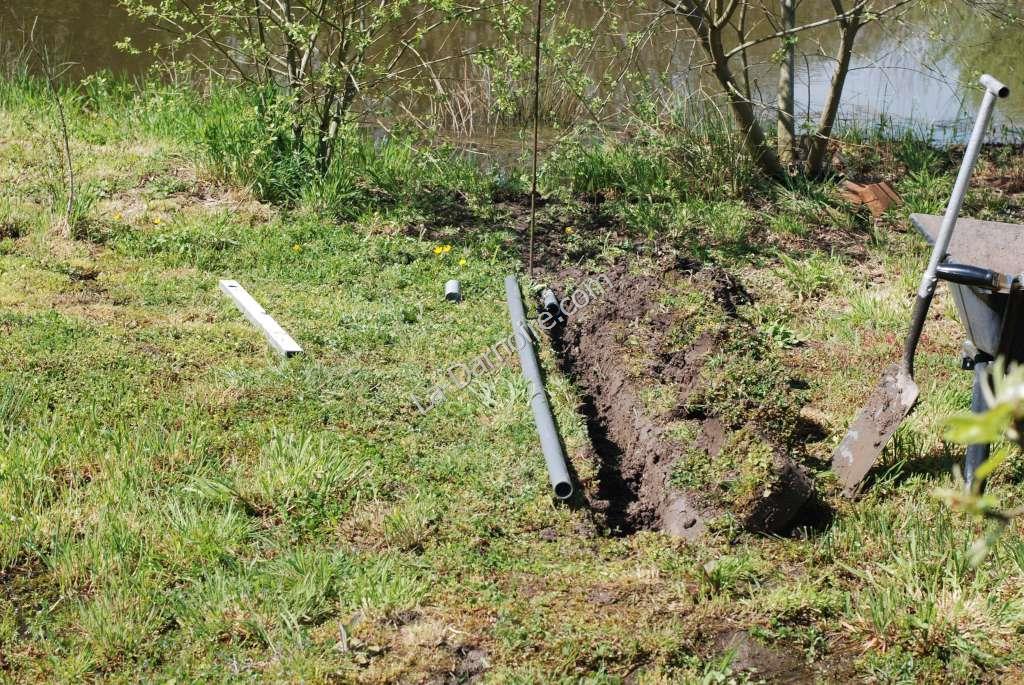
Having marked out the position of the reedbed, I started at the lowest point of the system, the pond. I dug a trench and started installing some 40mm PVC pipe, ensuring that each length of pipe had a suitable "fall" (in other words, slopes the right way).
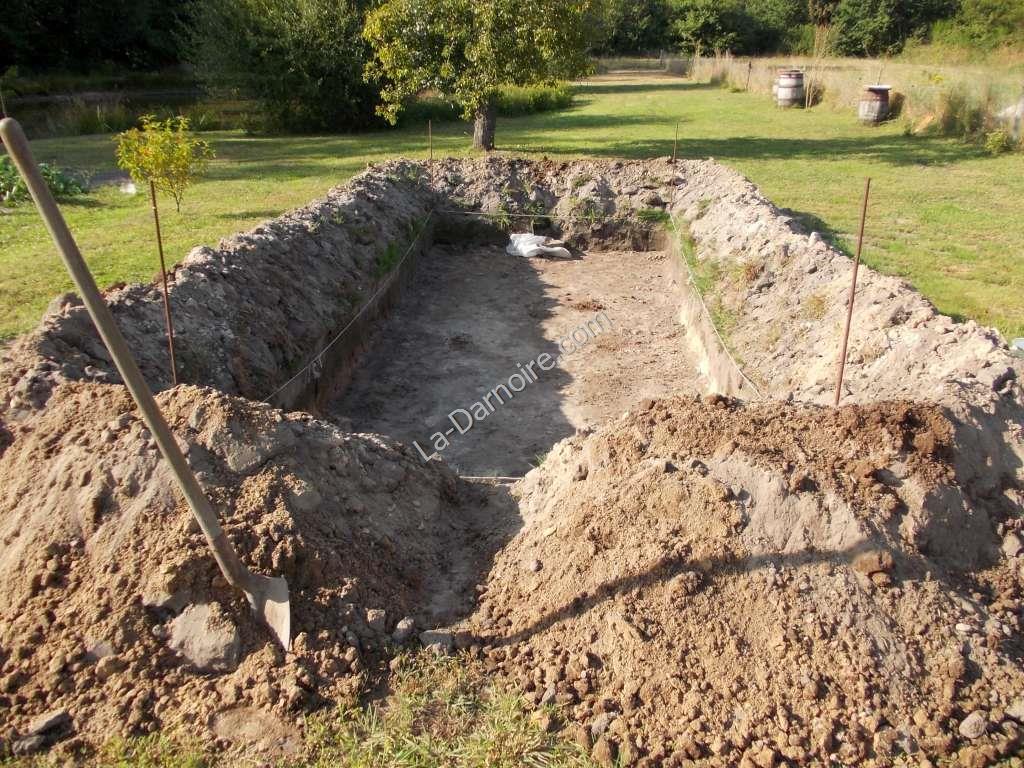
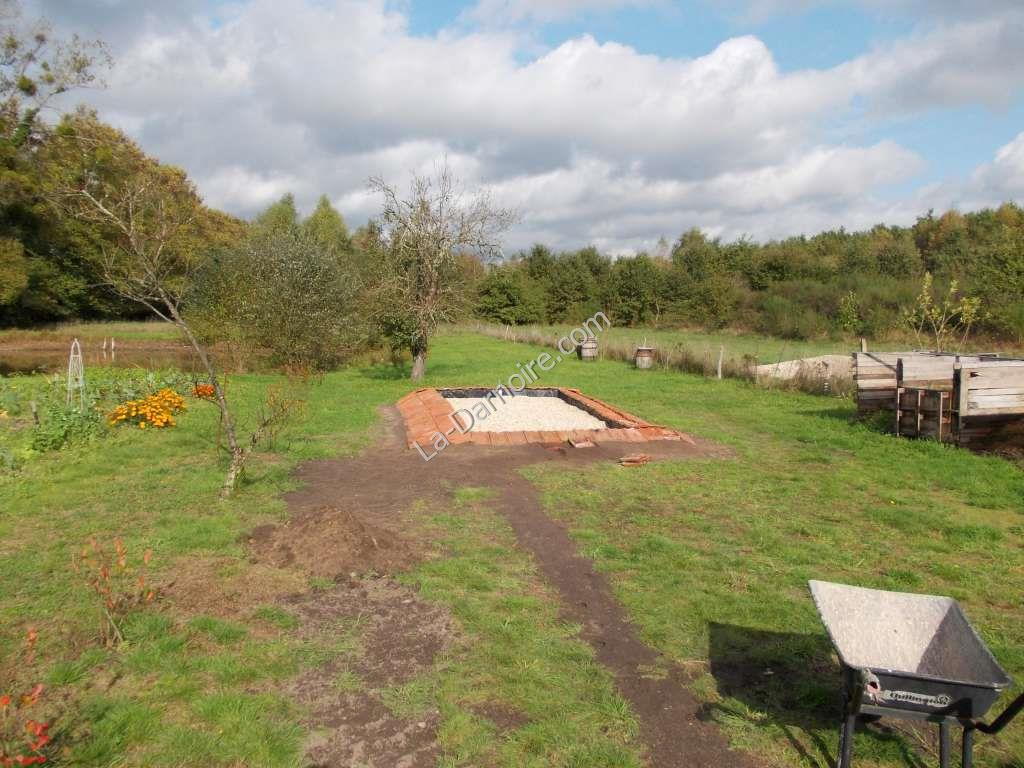
LSS volunteered to help at this stage, reporting for duty with a long-handled shovel. Here's the massive hole in the garden (I excavated maybe 20% of it)!
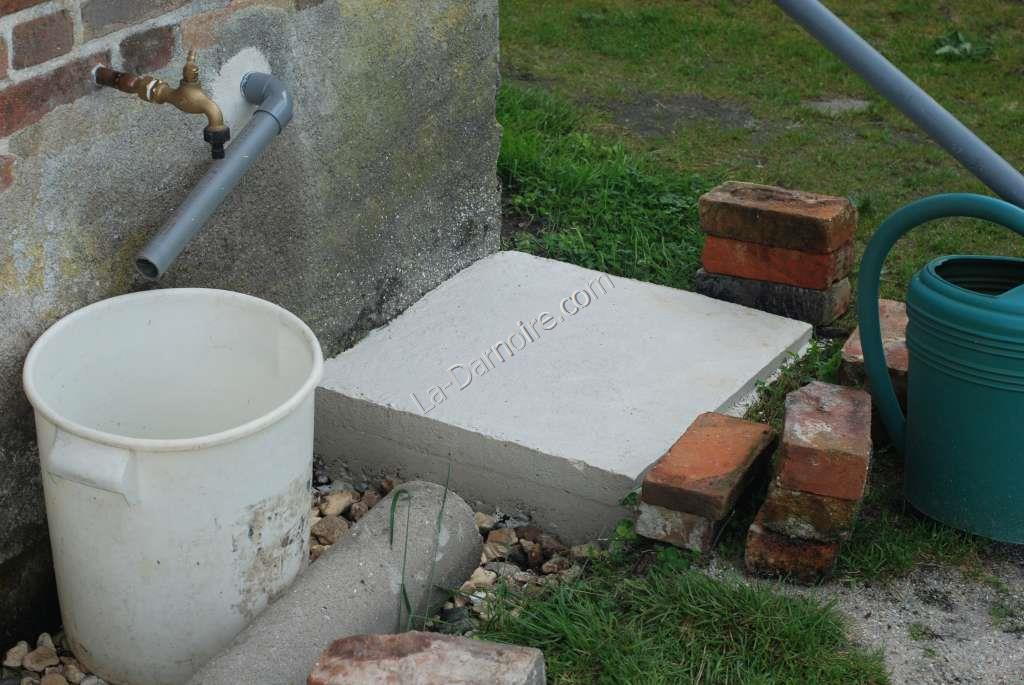
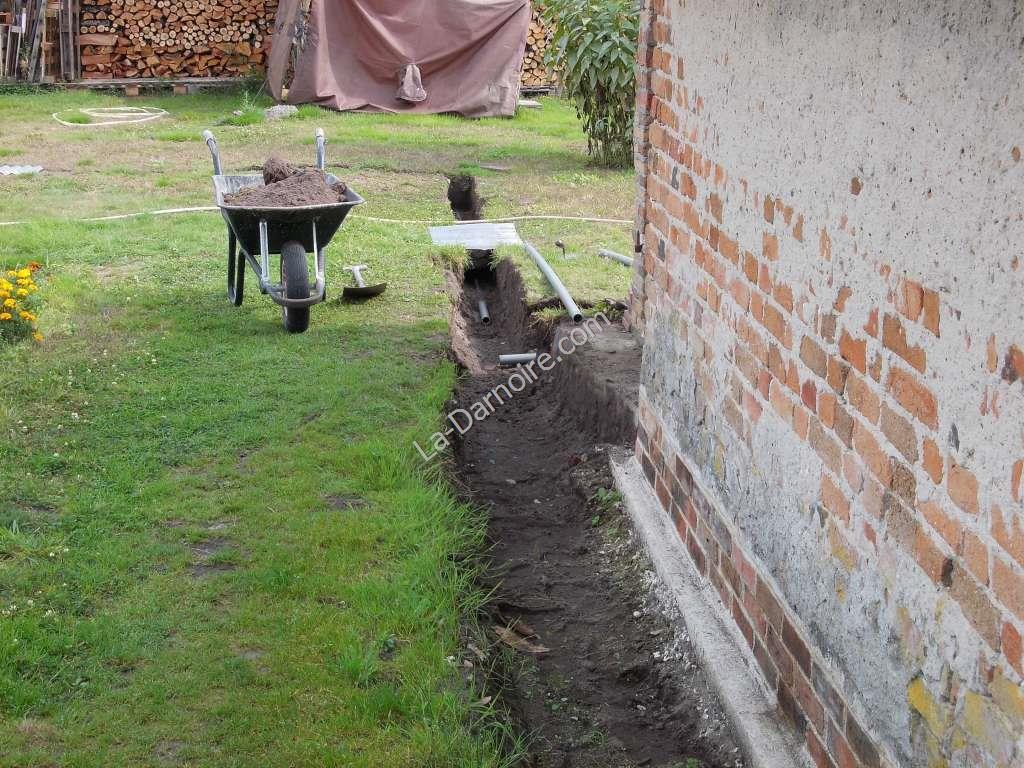
Whilst LSS was wielding the shovel, I laid a lime concrete footing for the rainwater barrel outside the kitchen. In the photo you can also see the replacement kitchen wastewater pipe draining into a manually-emptied 20-litre bucket until such time as the reedbed is ready. The concrete pipe in the foreground was used to channel the kitchen wastewater pipe and rainwater overflow pipe under another footing which will support a brick-built wood cupboard and propane cylinder store. More on that at a later date!
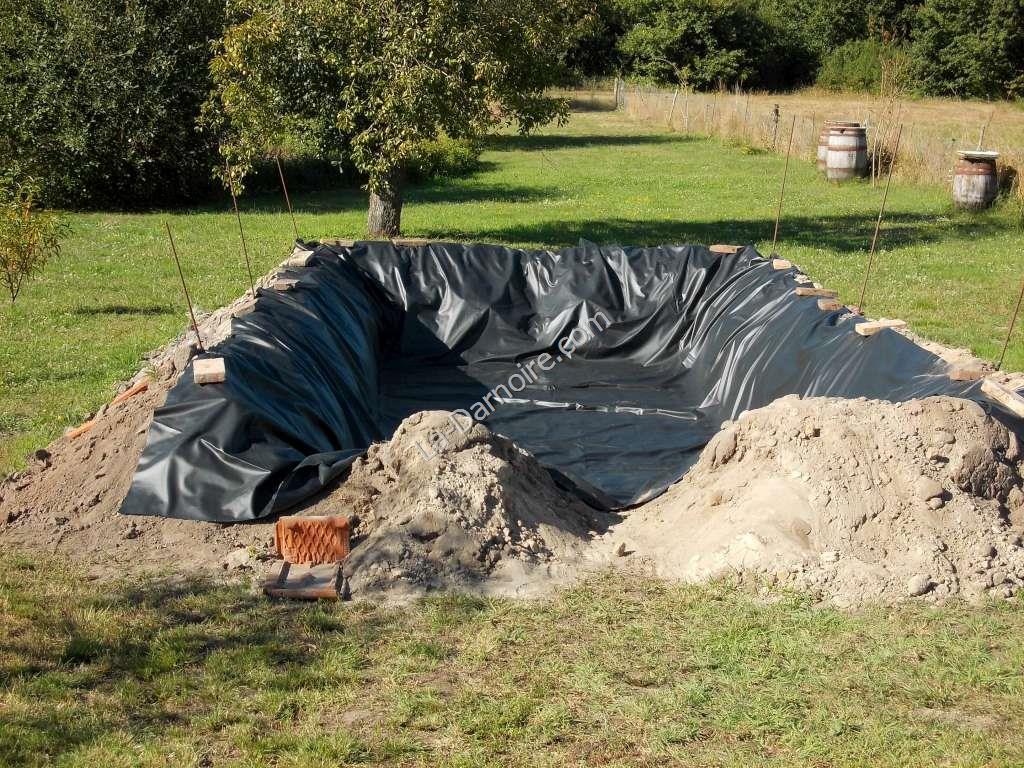
The hole was then lined with a layer of geotextile fabric, to discourage moles or tree roots from puncturing the liner. A 1mm-thick PVC pond liner membrane was then laid on top of the geotextile and held in place with bricks.
I then installed a push-fit 40mm diameter PVC tank connector through a small hole I cut in the membrane on what will be the bottom of the reedbed, making sure there was a good seal by using some silicone sealant in addition to the rubber washers. This is for the outflow drain.
I'm not an artist by any means, but I've sketched the details of this drain here. Think of a bath plughole (the tank connector), where instead of a plug, you have a close-fitting pipe instead. When the water level reaches the holes drilled in the PVC pipe, it trickles down the pipe to the pond. (*See update, 2014, below.) The outer pipe is to prevent gravel falling into the tank connector hole if the pipe is removed. The bottom of this outer pipe is raised off the bottom of the reedbed by a thin layer of gravel, allowing water to flow underneath it. The reedbed can be drained at any time by just removing the central pipe.

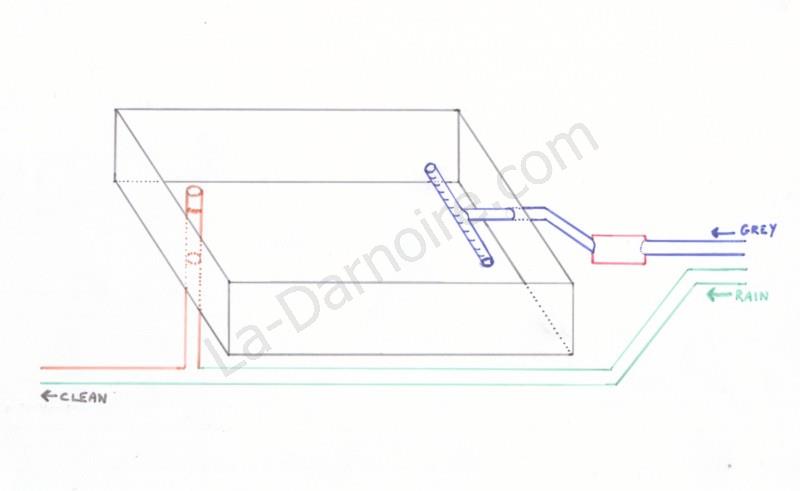
"That's all very well," I hear you say. "But how does the water get into the reedbed in the first place? And what's the T-junction for?" Time for another sketch!
The blue lines represent the greywater pipes coming from the house. The red box on the right is the greywater filter.(*See update, 2015, below.) Excess rainwater from the Rainwater Recovery System (pipe shown in green) flows down a separate pipe, joining with the reedbed drain (shown in orange) via a T-junction. From there it exits to the pond. Doing it this way meant I did not have to dig two separate trenches!
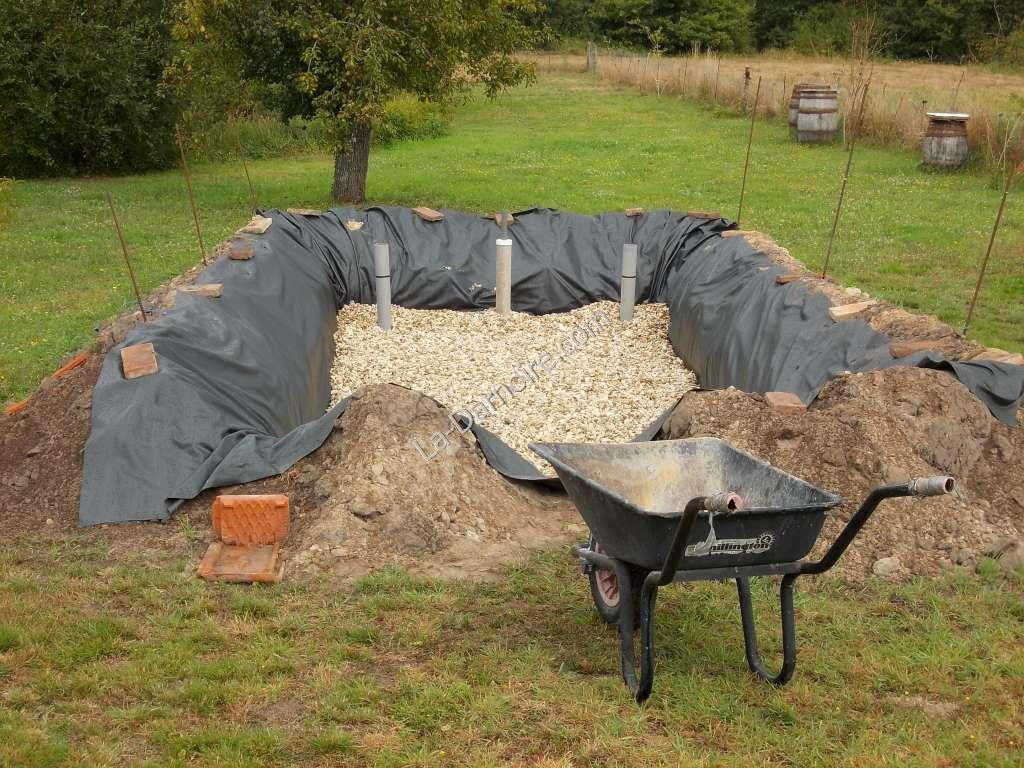
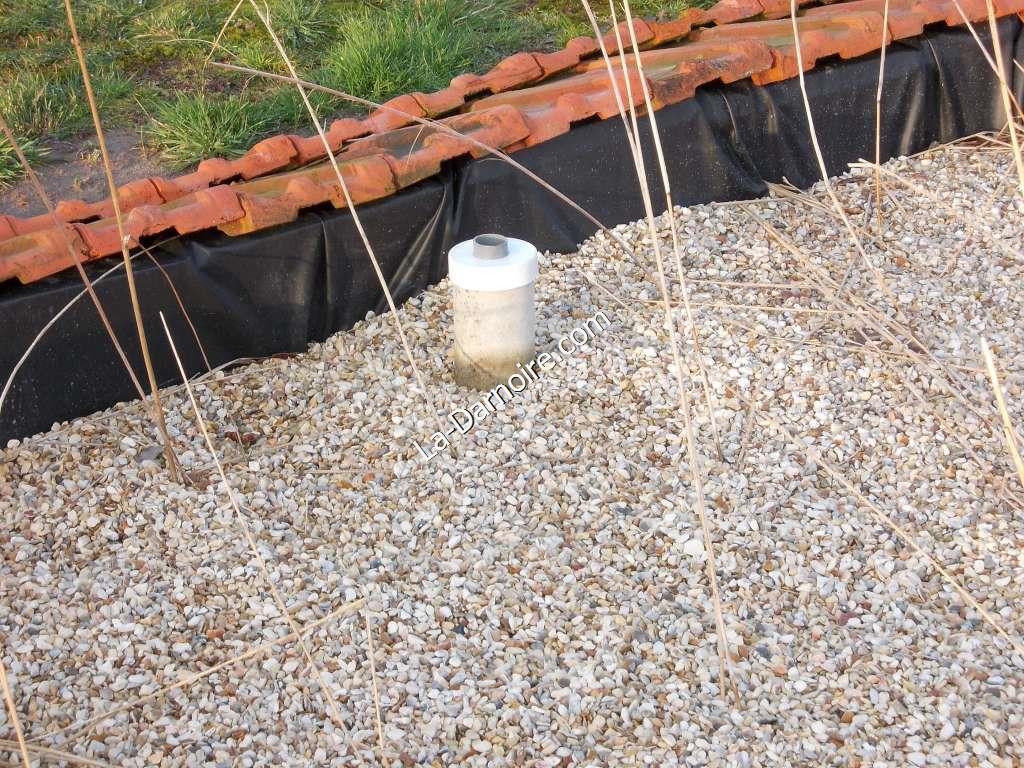
It was now time to start using some of the 12 tons of gravel we had had delivered. This was again a manual process, using a shovel and the wheelbarrow. The grey posts on either side at the back of the reedbed are temporary; they indicate the depth to which the reedbed will be filled with the coarse gravel. The pipe in the centre with the white top is the outflow drain.
Technical data
The reedbed is 60cm deep, filled with two sizes of gravel. We used some coarser 10/20 gravel to a depth of 40cm, and then covered this with about 10cm of pea gravel (4/10). It's 2.2m in width and 5.4m long. This gives a total volume of 6m3. For a 4-person household the recommended size is 7m3, so we should be fine.
To take a break from pushing wheelbarrow-loads of gravel, I started digging the trench for the greywater piping. Unfortunately this meant pushing wheelbarrow-loads of earth instead.

The pipe you can see installed in the trench in the next photo is for the rainwater overflow. As it's at a lower level in the ground than the greywater pipe, it was obviously laid first. On the right you can also see the wall of the attached barn, with the foundation now repaired and bricks replaced.
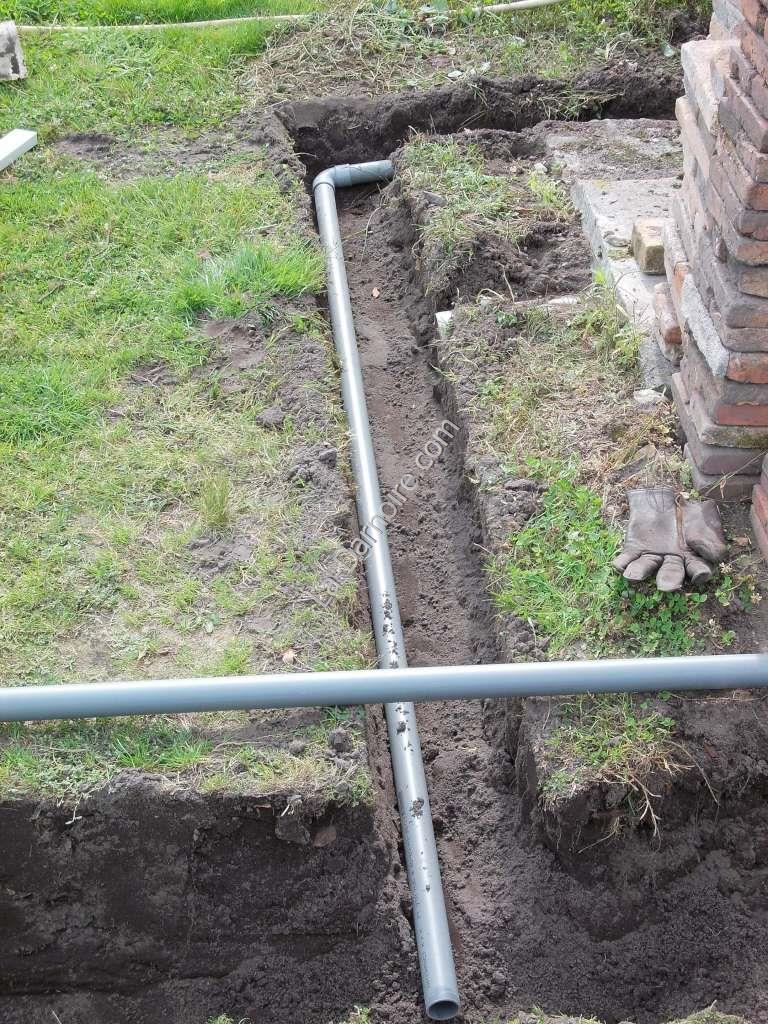
At the point where the rainwater overflow pipe joined the main trench, I decided to install an additional greywater pipe to the former outhouse. This will be re-purposed as a summer shower cubicle, with the waste water being treated by the reedbed.
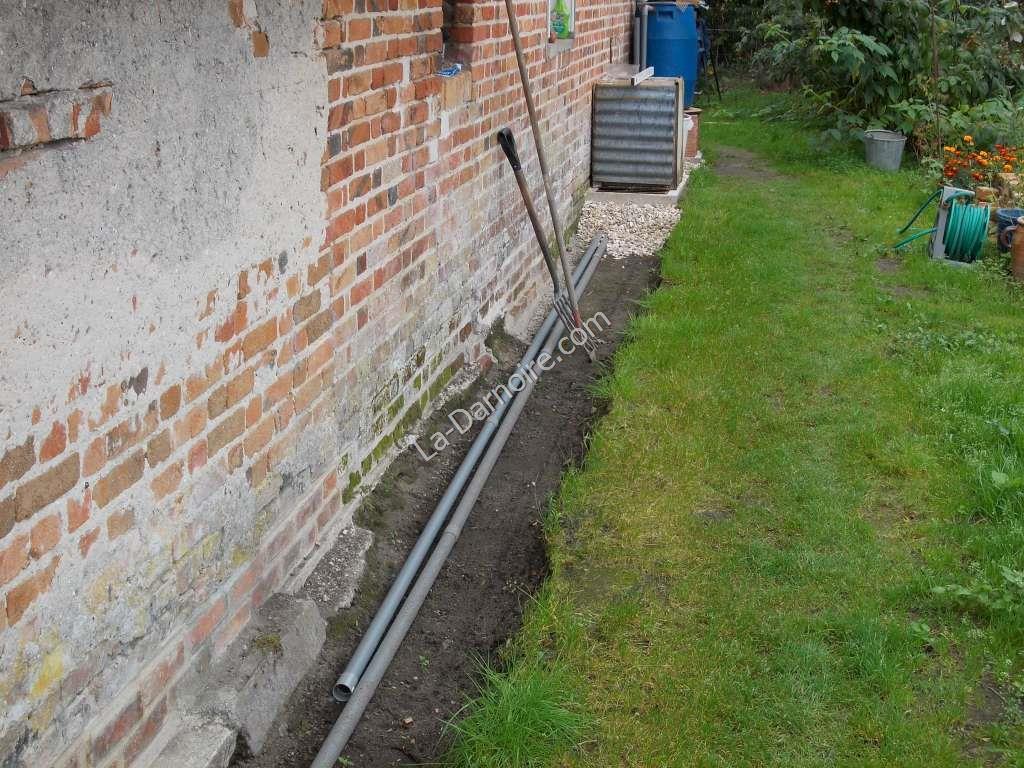
Laying the pipework continued. Next to the house, I covered them with a layer of gravel which will hopefully provide some frost protection. In the distance you can see the foundation for the wood cupboard. At the moment it's home to the kitchen cooker's propane gas cylinder, sheltering under a corrugated-iron box.
For our future bathroom, I chiselled a hole under the wall and installed a T-junction:

Update, 2015
Now what I should have done is install a non-return valve here. Before the installation of the sump, the blocking of the reedbed filter meant that the waste water did not flow out of the pipes, but instead backed up into the bath. I have since installed a non-return valve on the other side of this wall between this pipe and the bath. The bathroom sink is still unprotected, however.
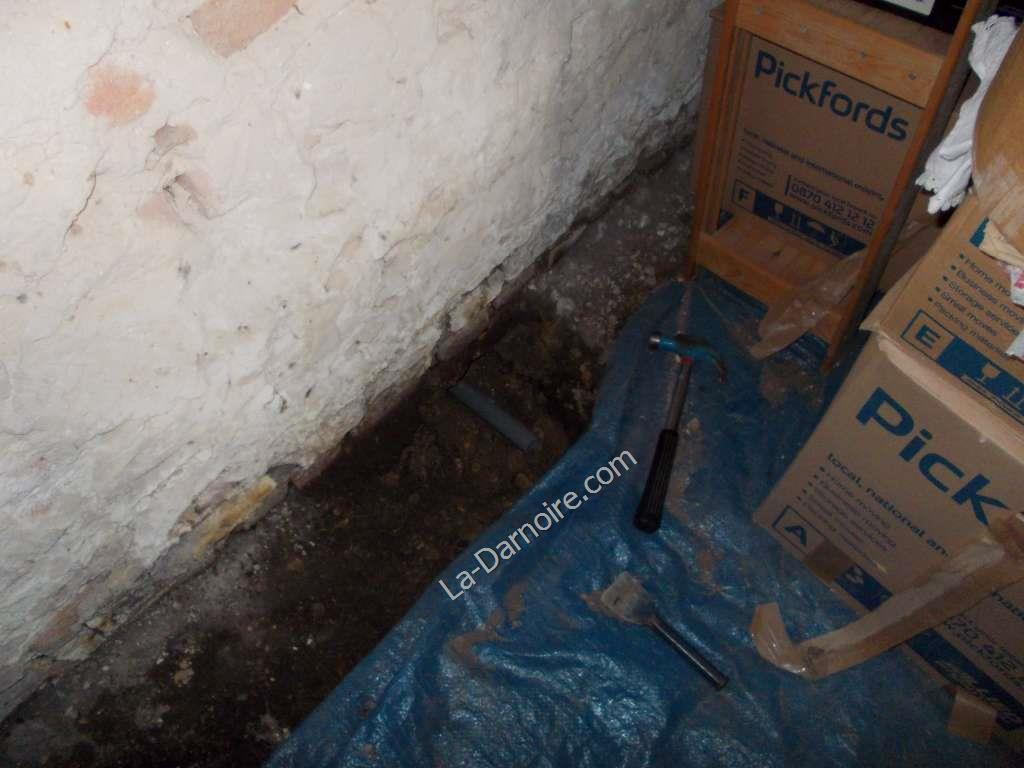
Here's what it looks like on the inside of the wall. I excavated a hole in the dirt floor down to pipe level. This will eventually be covered by a lime concrete floor. And yes, there are still moving boxes we have not yet unpacked!
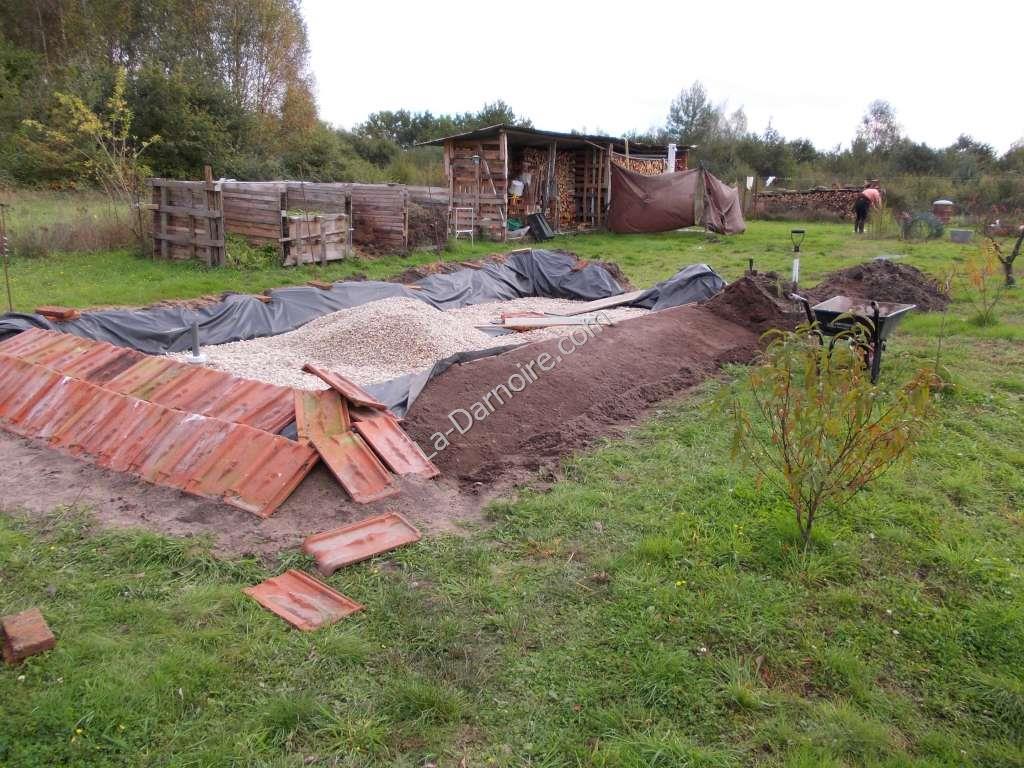
Right, back to the reedbed. By this time, the reedbed had been filled with coarse gravel, and the pea gravel was now starting to go in. I also started tidying up the edges, using old roof tiles (there are several piles of these around) to weigh down and cover the edges of the pond liner.
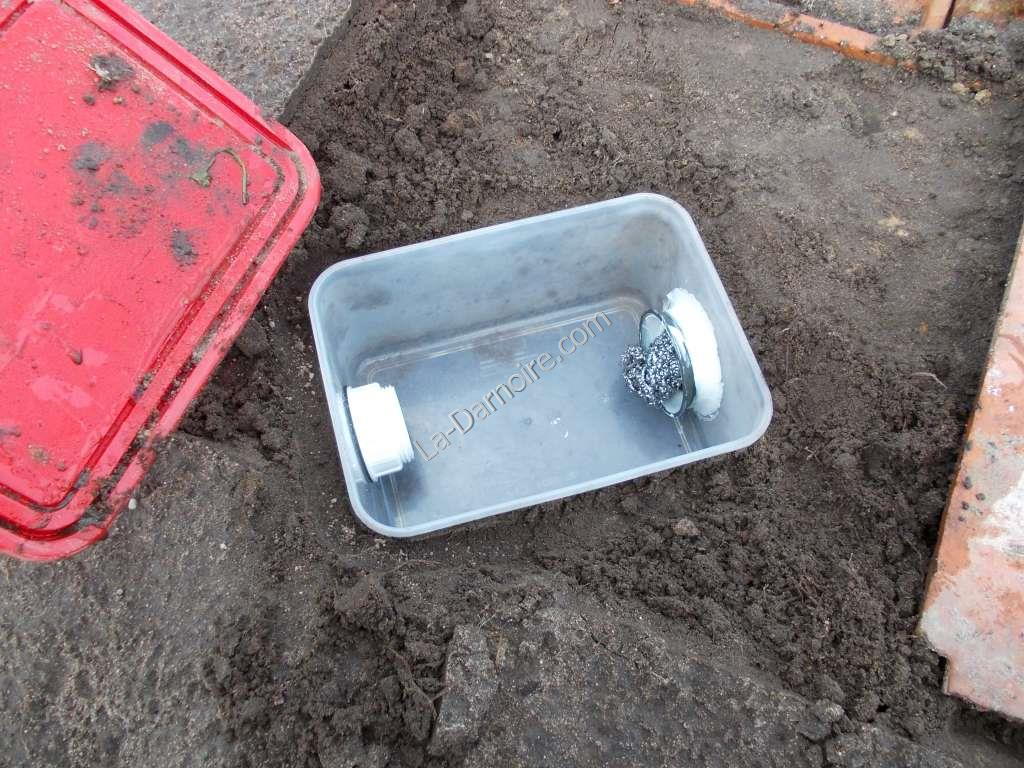
At the front of the reedbed, I installed a plastic box with close-fitting lid. A tank connector was used in each of the end walls, and a stainless steel pot-scourer inserted into the reedbed-side pipe. This will be the filter, catching all the gunky bits which are flushed down the pipe, and which would otherwise clog the reedbed entrance drain holes. (The pipes themselves are already buried so are not evident in the photo). The reedbed filter box is covered with some old roof-tiles, and is cleaned out on a monthly basis. (*See update, 2015, below.)
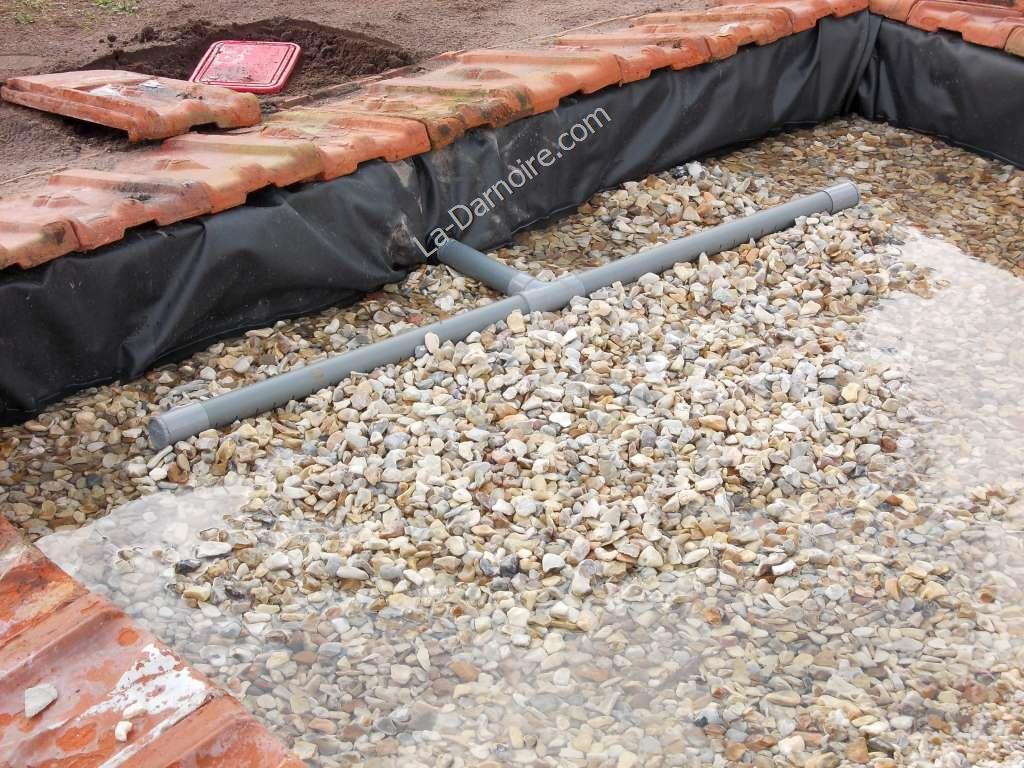
The pipe from the filter passes through the reedbed wall via another tank connector, and terminates in a T-junction. The pipes on either end of the T were passed through my radial arm saw, cutting a series of slots on the underside. This helps to distribute the grey water evenly across the width of the reedbed. (*See T-junction update below.) It had rained fairly frequently during the reedbed construction, so it had filled with rainwater. This was actually quite useful, as it helped me to level the final layer of gravel.
Here's a view of the opposite end of the reedbed showing the outlet pipe. The dead-looking grassy things are reeds. These were scavenged by LSS from sundry ditches over several weeks, on her way home from work, and were planted in the reedbed. However, this was done just prior to winter (obviously not an ideal time for planting!) so if they show no sign of growth in spring, we'll just replace them.
A final view looking towards the pond, showing the completed reedbed. Earlier I mentioned the lack of available depth for burying the greywater pipes; in the trench in this photo I was forced to locate the pipes just below the soil surface. Two sections actually have no slope at all, being practically level. There was really no other way of doing this though; even if the reedbed had been located at the other side of the pond, the slope would have been insufficient. Lowering the reedbed itself would have meant that the outlet would have been below the pond water level. It works fine like this though; but we did experience a problem when there was a frost; this section of pipework became blocked with ice. As a temporary fix I covered it with a thick layer of grass clippings. I later built a mound of earth over this trench for better insulation; and so far, so good.
Progress reports:
*Update, 2014
One morning we noticed water pooling on the surface of the reedbed. The cause of this problem was soon found. The holes which I had drilled in the reedbed outlet pipe had become blocked with a slimy substance. Whether it was algae, bacteria, or a fungus, I wasn't too sure. The problem was easy to remedy, because I had used a push-fit tank connector at the bottom of the outlet. I simply cut another piece of pvc pipe 45cm long (which was the height of the original outflow holes above the bottom of the reedbed), removed the clogged pipe, and inserted the new one. I was so sure I had taken a photo of the clogged pipe, but I can't find it anywhere! Water now simply flows into the top of the overflow pipe; no hole-drilling required.
*T-junction update
In summer 2014 we discovered a large puddle of water in front of the reedbed. Upon investigation, I found that the lid of the plastic lunchbox filter had been forced off. The culprit was actually the reeds themselves. Their roots had grown into the T-shaped perforated dispersal pipe, completely blocking it. I therefore removed it, so now the water just exits straight into the reedbed. This seems to work just as well, and we now keep the area around the pipe exit free from reeds to prevent any further blockages. So there seems to be no need to spread the greywater entry across the entire width of the reedbed.
*Update, 2015
Above, I mentioned that the greywater filter would be cleaned monthly. Very funny. I found I was having to clean it out weekly. And even this proved insufficient. Another problem we encountered was that the plastic lunchbox was simply too small. When we started using the outside shower, we found that the water was not draining away quickly enough. The only option left to us was to install a sump.
We purchased a 120-litre plastic drum with a close-fitting lid, and installed this in place of the plastic lunchbox. Greywater entering the sump passes through an ordinary plastic kitchen sieve. I purchased a 12V bilge pump with integrated float switch, and installed this in the bottom of the sump. The water exits the bilge pump through an ordinary garden hose, into a 10-litre plastic bucket with lid. It then drains away into the reedbed through the original pipework.
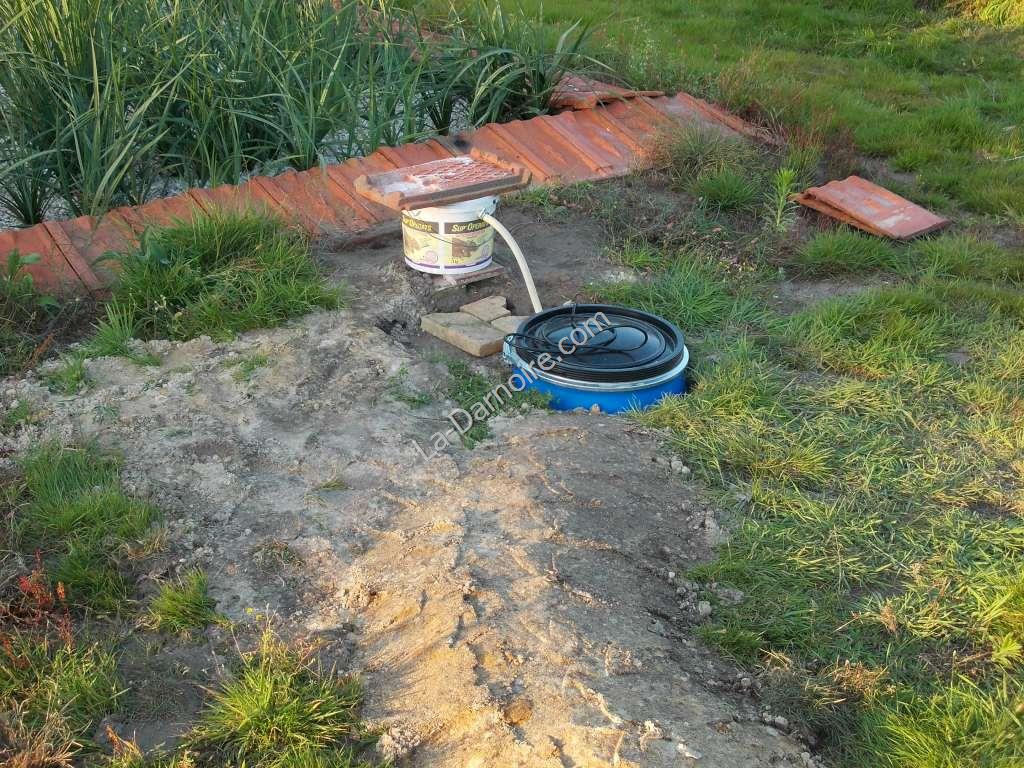
(I later bypassed this contraption entirely; the garden hose now goes from the bilge pump straight into the reedbed, through the existing PVC pipe.)
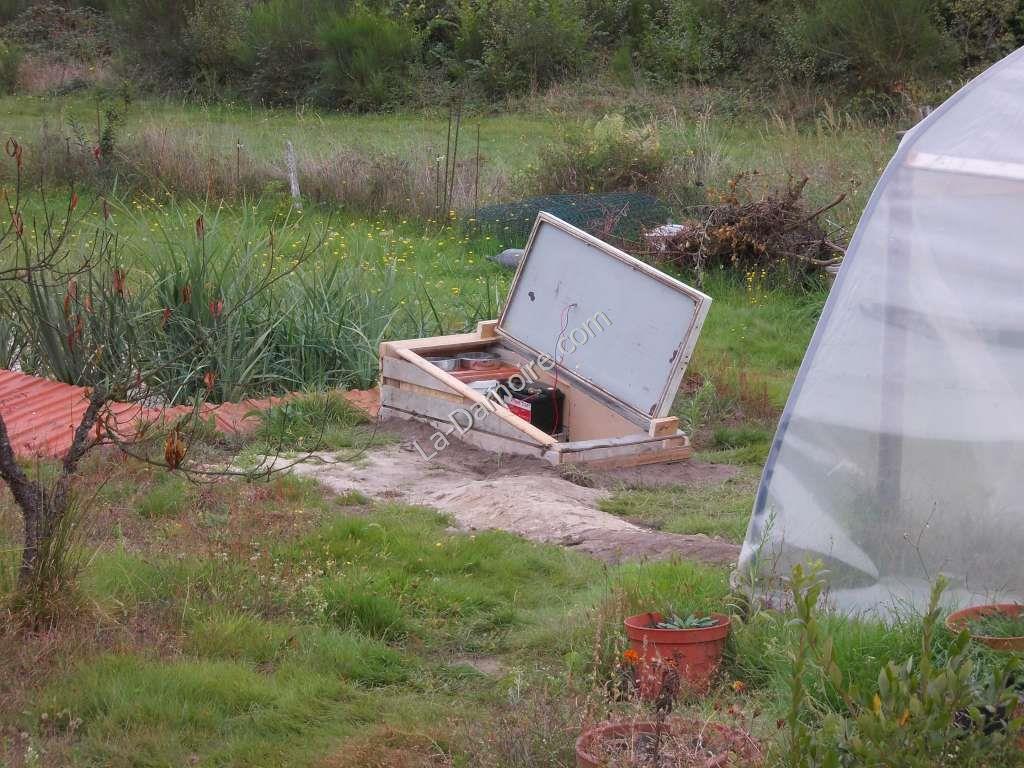
To power the bilge pump, a car battery was connected. This is recharged daily with a 40-Watt solar panel. I obviously had to construct some sort of housing for this installation, so a couple of old pallets came in handy, and I re-used an old refrigerator door which acts both as a lid and a support for the solar panel.
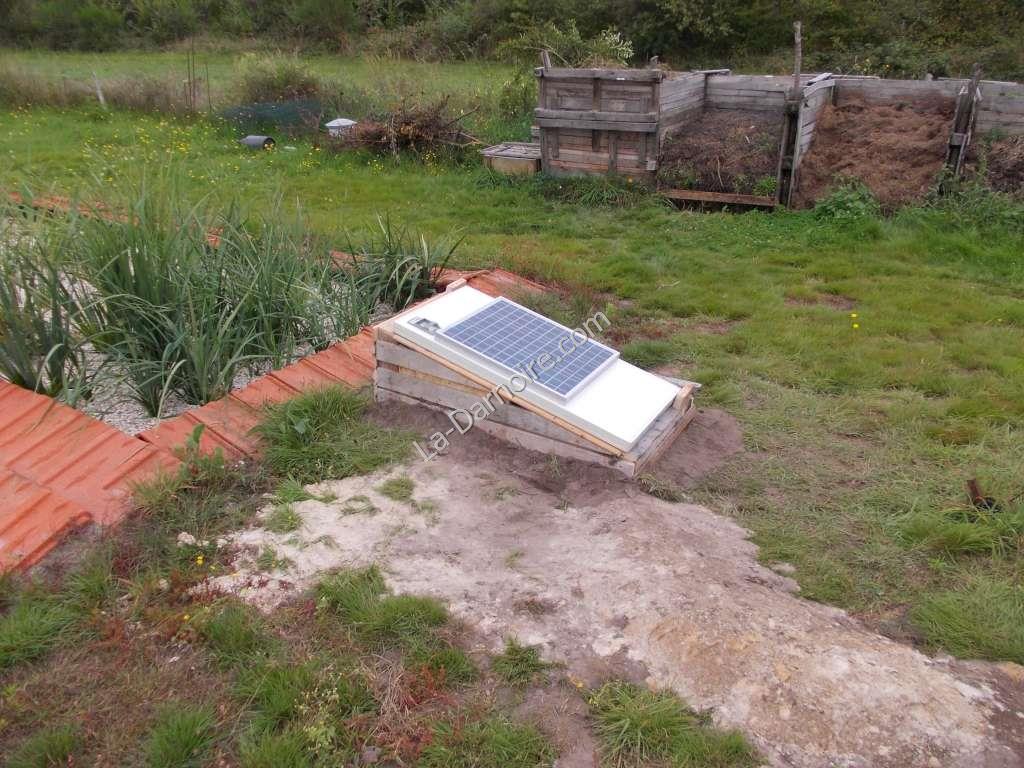
Here's what it looks like with the lid open:
Our troubles were not yet over, though. The water table in this region is fairly high, and after some fairly heavy rain, I noticed the refrigerator-door-lid of the sump housing was being forced open. The high water table was lifting the entire 120-litre sump barrel out of the ground like a cork. To solve this problem, I put some bricks inside the sump itself, and added a heavy concrete block on top of the lid.
It temporarily resolved the issue. Once the ground had dried out, I removed the barrel, enlarged the hole, and encased the barrel with poured limecrete. So the water table no longer has contact with the barrel.
And yet another update...
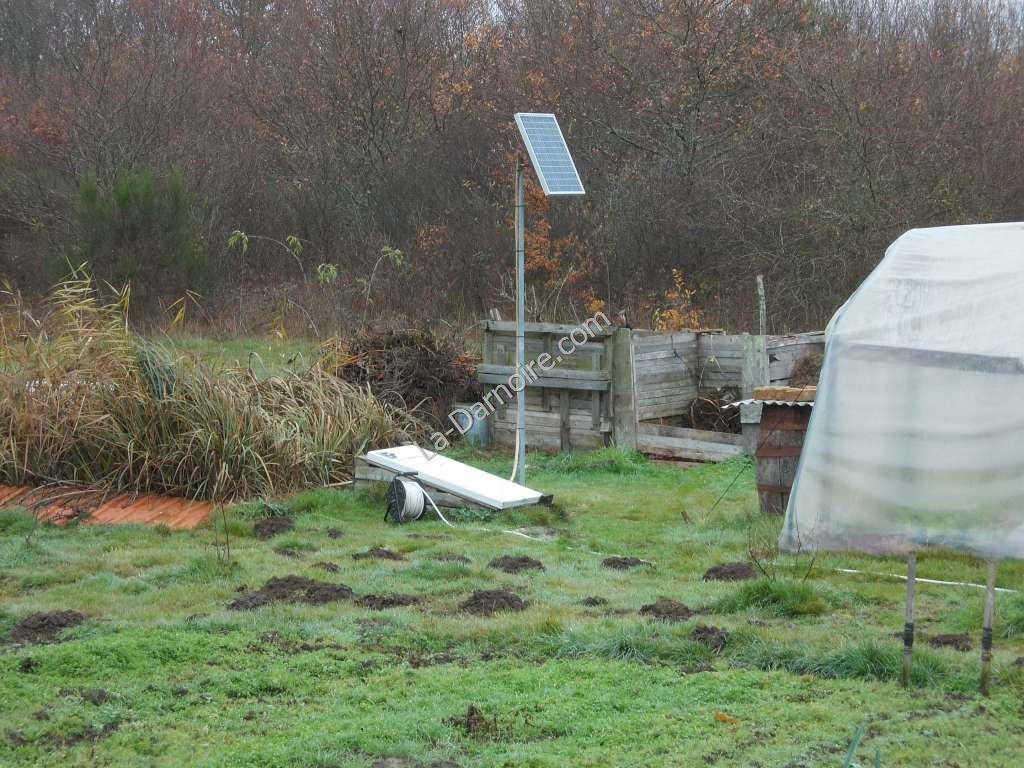
The solar-panel-on-refrigerator-door worked fine in summer, re-charging the battery every day. However, in winter, it transpired that the polytunnel was shading the solar panel - so the battery went flat. Twice. I therefore constructed a metal mast with an adjustable bracket. This allows the solar panel to be adjusted to three different angles to maximize power generation:
19° from the horizontal for summer;
44° for autumn and spring;
and 66° for winter.
These angles were calculated based on our latitude, from a formula found at https://solarpaneltilt.com/.
The original 50Ah car battery only lasted a year, and then would not accept a charge. I managed to recover it using my Optimate 6 charger, and it has now been put in the garage as a spare. This is why one should use a deep-cycle battery for a solar installation; a car battery cannot handle the constant discharge-recharge cycle. We have now replaced it with an 80Ah AGM battery which will supposedly last a bit longer. However, car batteries are much cheaper than deep-cycle batteries - so you may wish to do your own cost-benefit analysis to determine if it would be cheaper to just replace the car battery every year.
And a final update for this page: The 12V bilge pump eventually died, and has now been replaced with a 220V sump pump. It's still solar-powered though, being connected to our battery bank via an inverter.