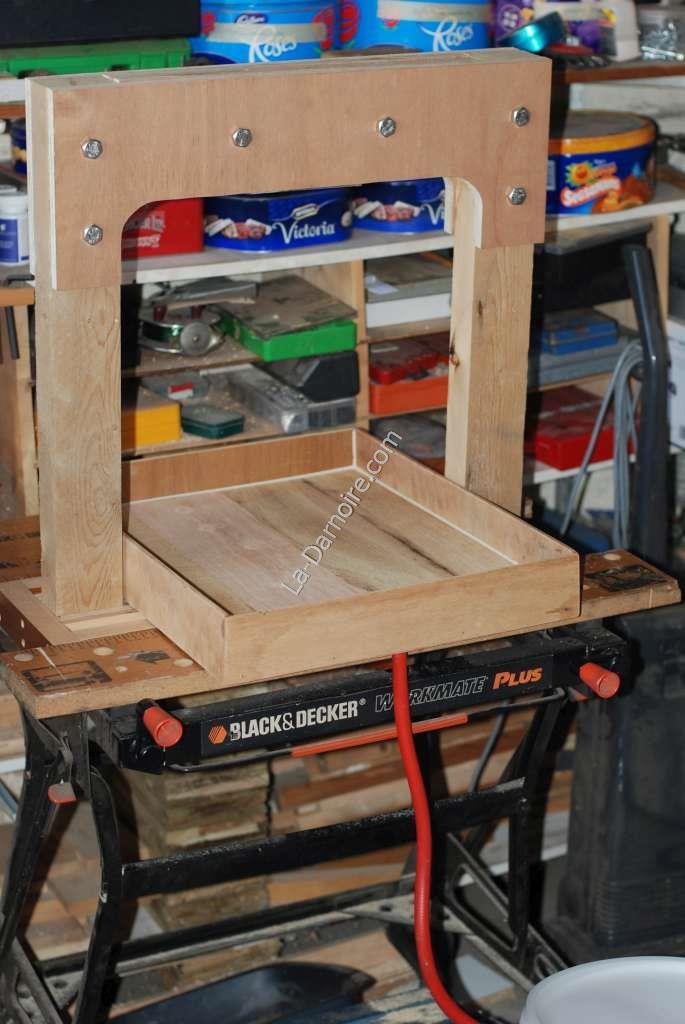
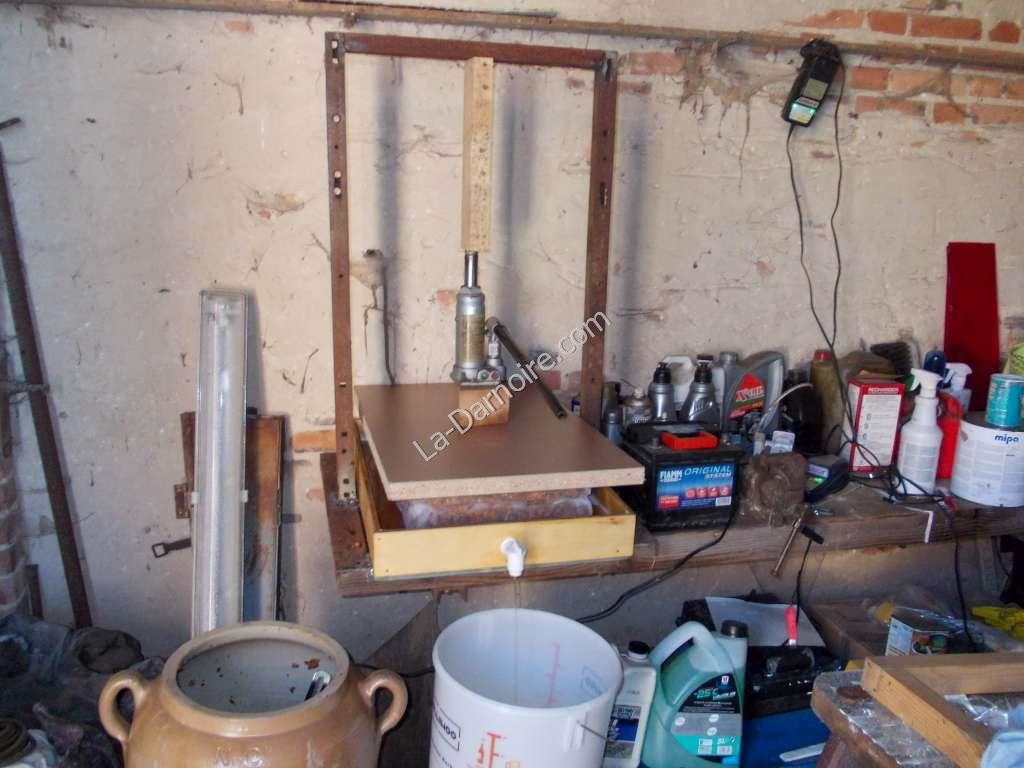
I made a wooden frame using several thicknesses of plywood. On this frame, I placed a wooden tray which has a hole in one end, with a pipe leading to a bucket.
(Click photos to enlarge)
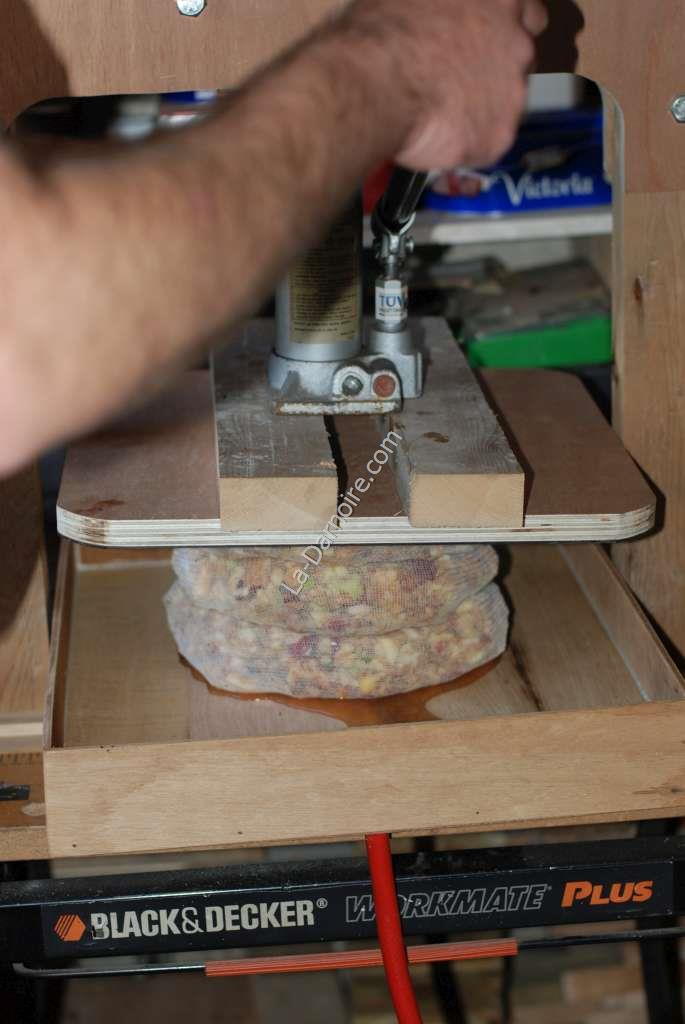
The apple pieces are placed in nylon mesh material (some old net curtains provided this) and stacked in place on the tray. Each of these packages is called a "cheese". Another board is then placed on top of the cheeses, and a bottle jack is then used to exert the pressure.
Version Two
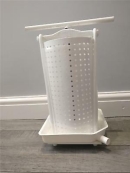
As mentioned, the wooden section across the top cracked when I attempted to use the press in my second year of cider-making. We had to revert to pressing the apples in a small fruit-press similar to this one:
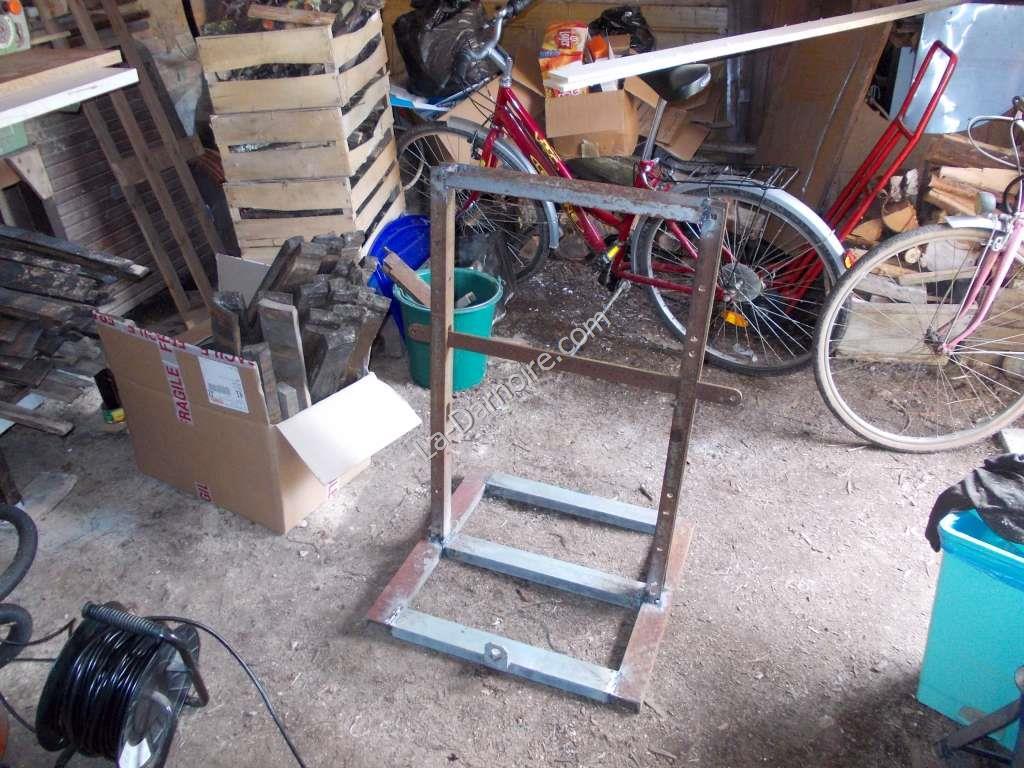
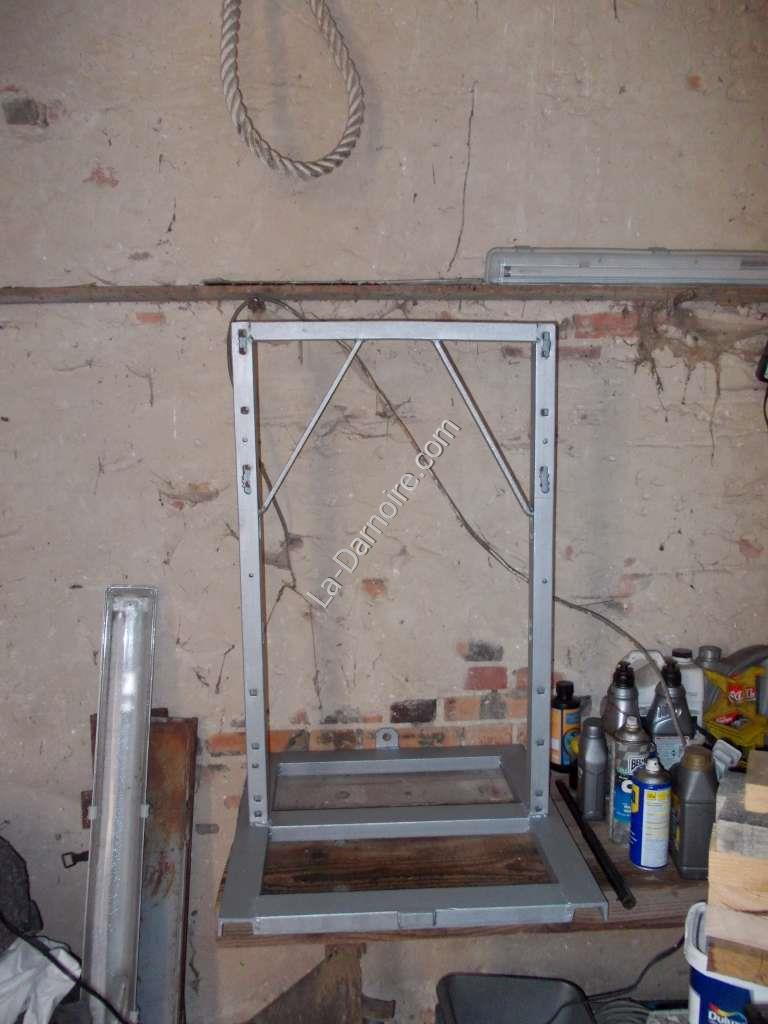
As you can imagine, this was a lot of work! So when we got to France, I started constructing a new, improved, strengthened model, using steel this time! I welded up a frame similar in shape to the previous model. (Ignore the cross-piece in the middle, this was not used):
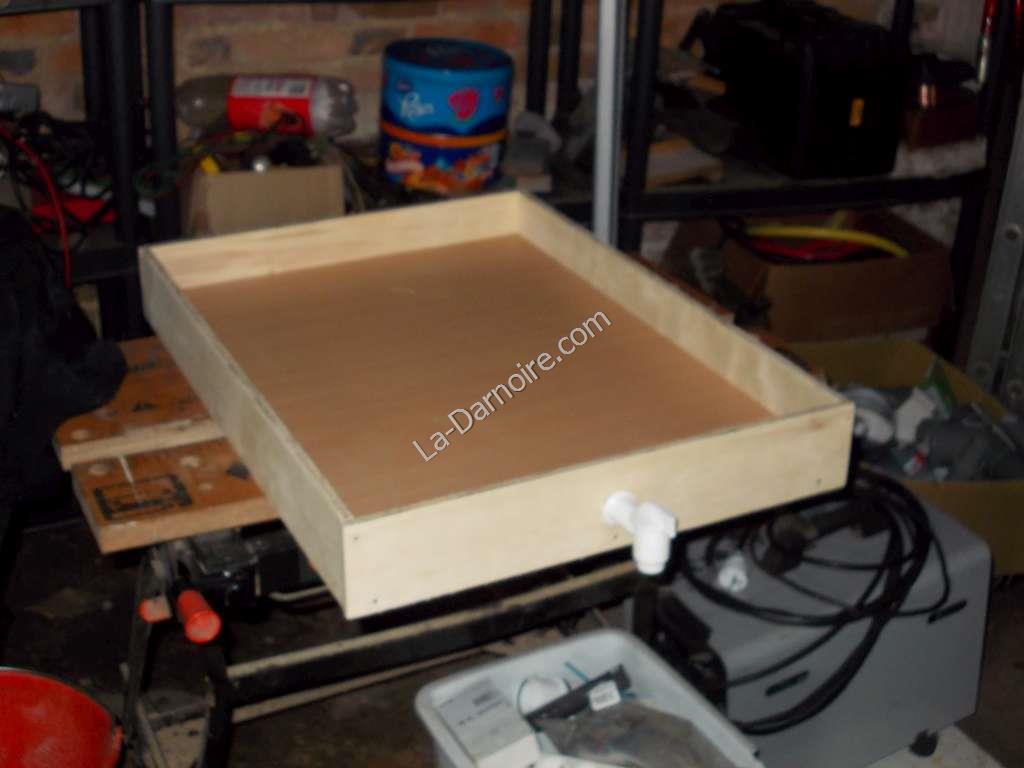
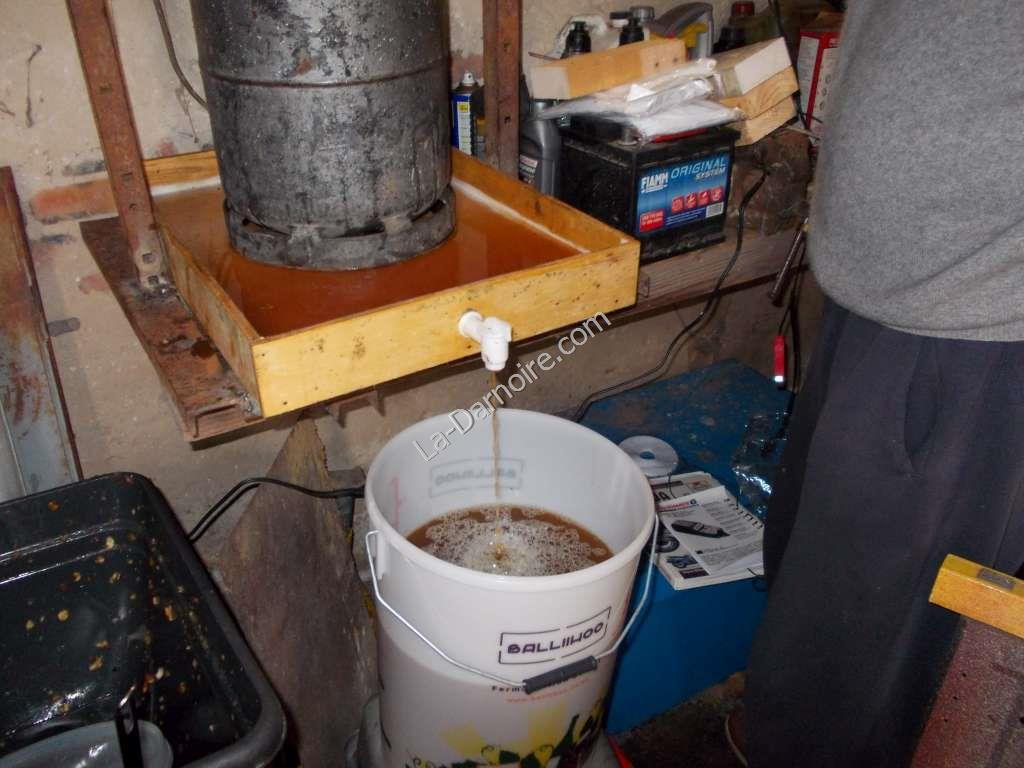
I had a piece of kitchen worktop left over from the installation of our new kitchen sink, so I used this as a base for the juice tray. Using the radial arm saw, I cut it to the right size to fit inside the metal frame I had made:
I attached some pieces of plywood to form the sides, and installed a plastic tap for the juice flow.
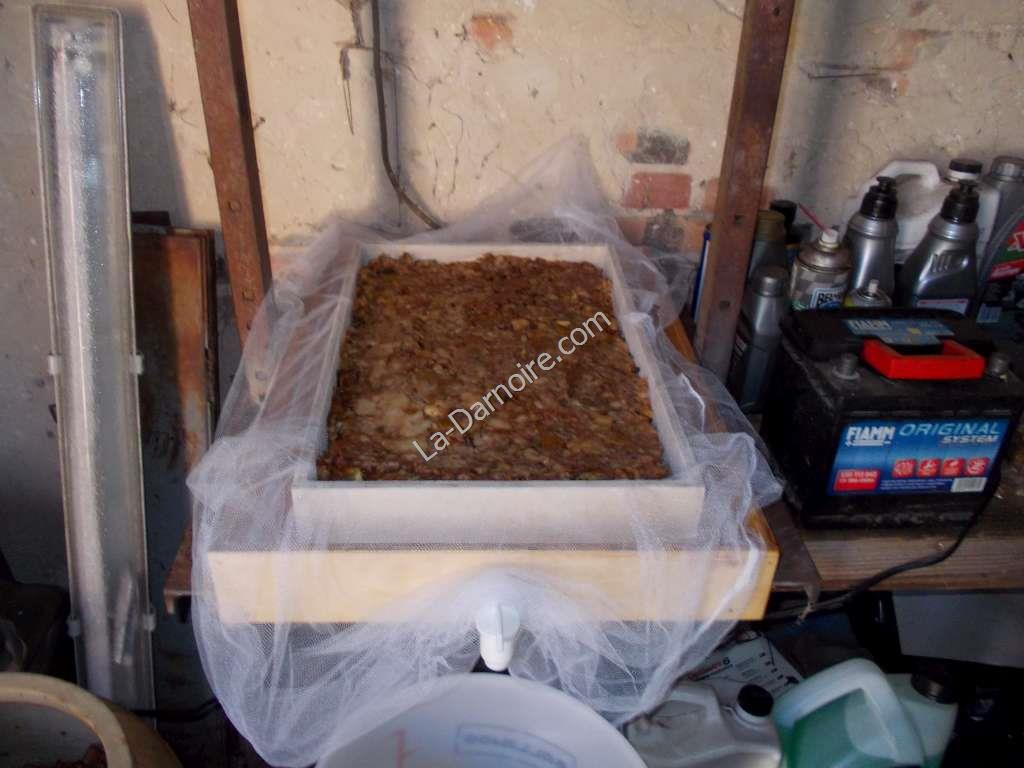
Once again, some net curtain material was used to keep the pulp in place whilst being pressed. I also made a wooden frame to help form the shape of the cheese:
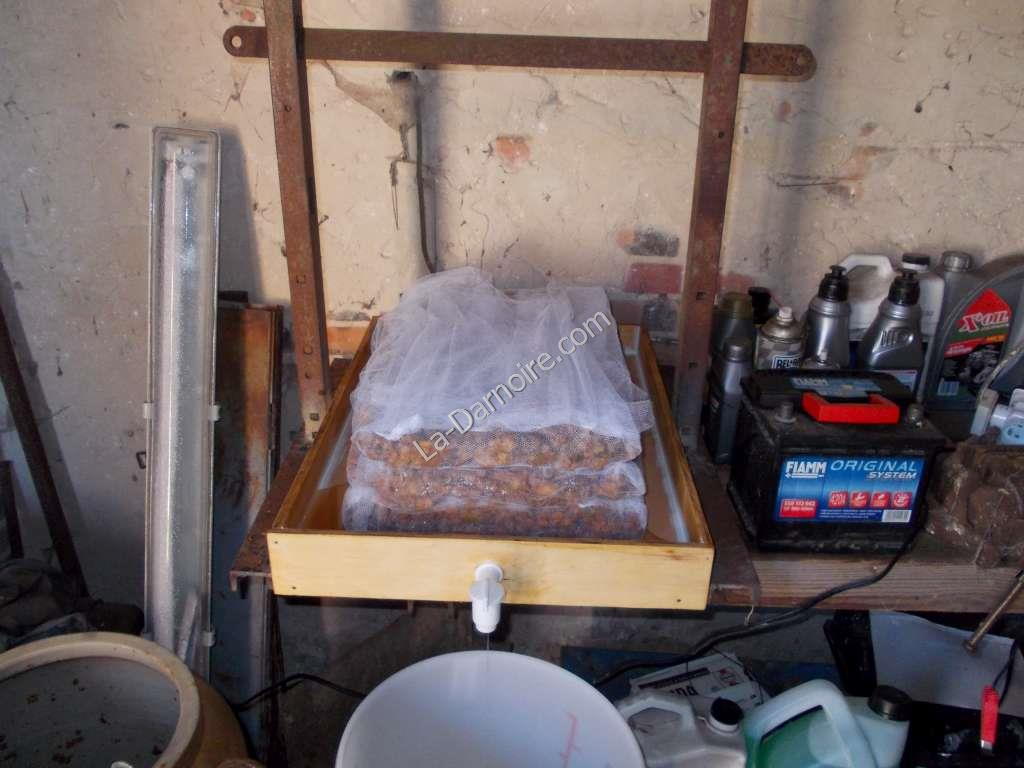
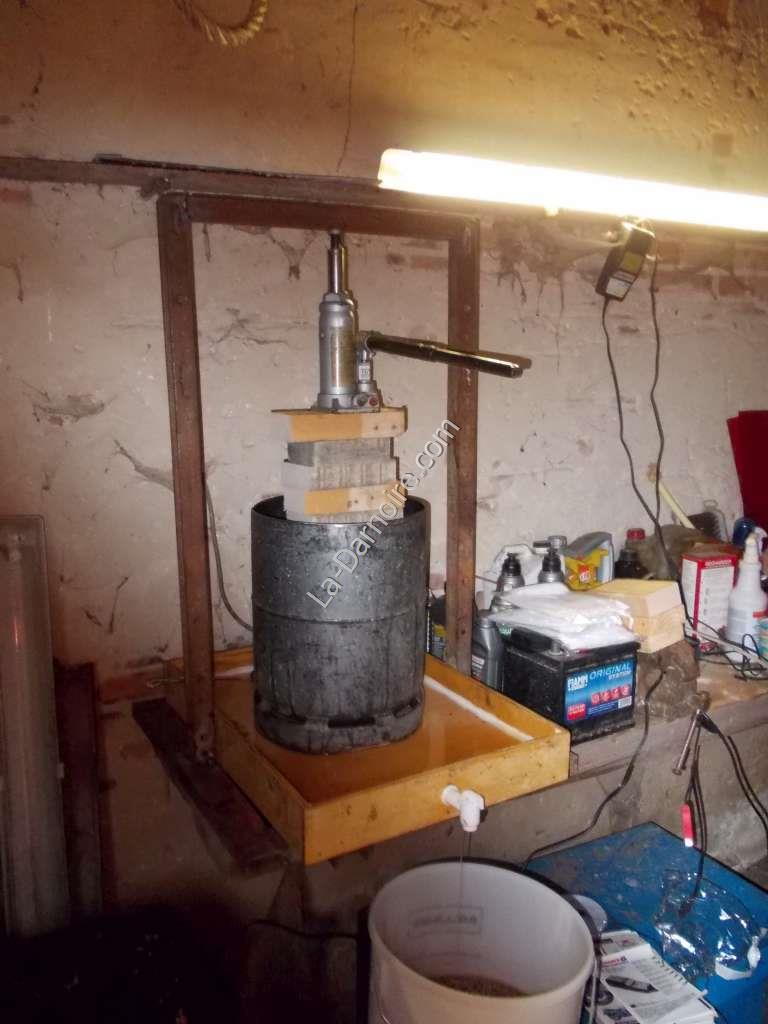
Once several cheeses had been stacked on top of each other, the juice had started flowing on its own:
Another offcut of kitchen counter top was then placed on top of the stack of cheeses, and the car jack installed. Using an hydraulic jack is so much easier than turning a screw-thread! I had to use a length of wood as I had made the frame slightly too high. (This turned out to be just as well, because Version Three actually required this extra height!)
Version Three (or rather, Version Two with an addition...)
Another issue became frustratingly evident as more pressure was applied. Although the jack was providing enough pressure, the cheeses were starting to slip sideways. And the top of the frame was starting to bend upwards. At this point, T&M paid us a visit, and managed to convince me not to just throw the whole lot into the dustbin.
Instead, I was introduced to a friend of theirs.
Disclaimer: The following is entirely hypothetical and fictional, and the photos, therefore, are obviously computer-generated; and must therefore also be fictional.
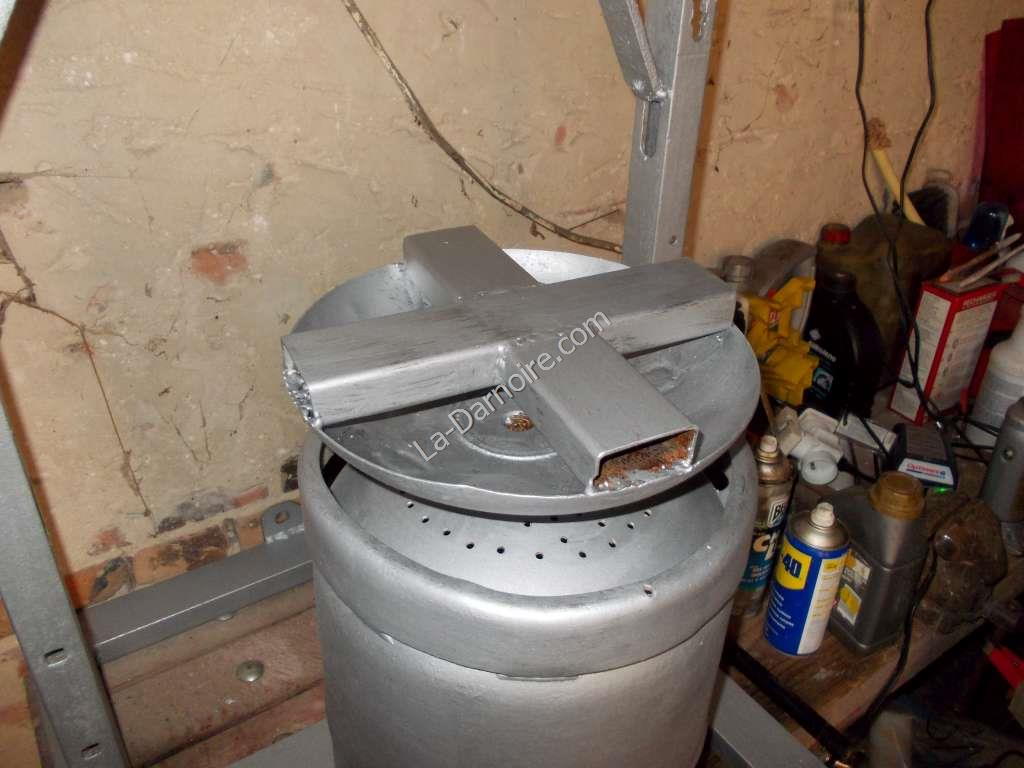
So this hypothetical friend constructed a "cheese-holder" by hypothetically using his enormous metalworking lathe to hypothetically modify a cylindrical object which previously held a flammable gaseous material, and which one is absolutely not allowed to modify! Please note I do not recommend you do this yourself, and accept no responsibility whatsoever if you do. As I've explained above, it's all purely hypothetical. I drilled lots of holes in the base to let the juice out, and later gave this hypothetical item a coat of paint:
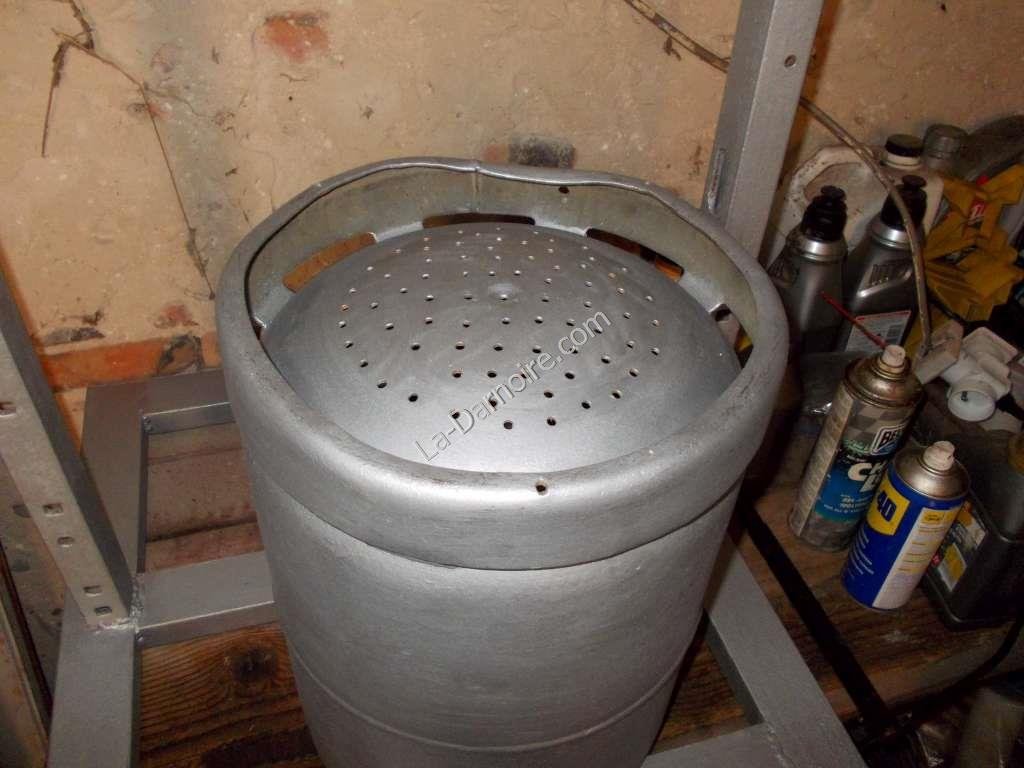
The top of the original item had been sliced off, trimmed, and strengthened by welding some square tubing into the middle. This modified top of the aforementioned hypothetical cheese-holder is inverted during the pressing process, and is a fairly close fit within the walls of the steel cylinder. *See update below.
Whilst I had the paintbrush out, I gave the steel framework a coat of paint as well. You'll note I also added some bracing to the top rail.
So, does Version Three work? Oh yes... like a charm.
The cheeses (still in the net curtain material) being removed from the press were practically dry. With the pulp now converted into apple juice, we can now get on with making apple cider!
* Update, November 2015
During use, I did discover that the original "lid" had a flaw. Whilst pressing, the juice tended to flow into the concave dish-shape, and when removing the lid at the end of pressing, this juice was wasted (the removal of the lid invariably involved tipping it sideways, so the juice spilt out onto the already-pressed pulp).
I therefore cut a circle from an off-cut of kitchen worktop, and have been using that instead. It's much more efficient.
Some 5mm holes have also now been drilled in the lower sides of the press to allow more juice to flow out.
For a future modification, I intend to make a bracket to hold the top of the jack firmly to the top of the frame; this will make it easier when adding more blocks of wood - otherwise one tends to need three hands! (Edit: I didn't bother; I just welded the top screw of the jack to the upper crossbar.)
* Update, November 2025
The wooden tray started to crack due to the tremendous pressure from the steel cylinder. It was therefore replaced with an old steel oven tray, with a hole drilled in one corner to let the juice out.