In keeping with the La Darnoire Philosophy (i.e. spending as little money as possible and recycling as much as is practical) we decided to build the wood shed by using pallets. In the local village is an agricultural implement supplier, who was quite willing to let us have some of his discarded pallets. We returned several times, but he never had enough for our needs. When we visited JP (who owns a farm near Chartres) we were delighted to discover that he also had a stock of unwanted pallets; he receives a fairly steady supply of palletised animal feed. And as we had the trailer with us at the time (we were returning his oxy-acetylene welder which I'd borrowed) we simply filled it to the brim with these versatile wooden objects!
Also, a house was being built in the local village, and LSS noticed, when driving past, that the roof tiles had been delivered on pallets. She stopped and asked the workmen whether we could have the pallets once the tiles had been installed. The foreman agreed, saying they could be collected the following week.
Unfortunately when we returned the following week, they had simply burnt them. Not quite cricket, what?
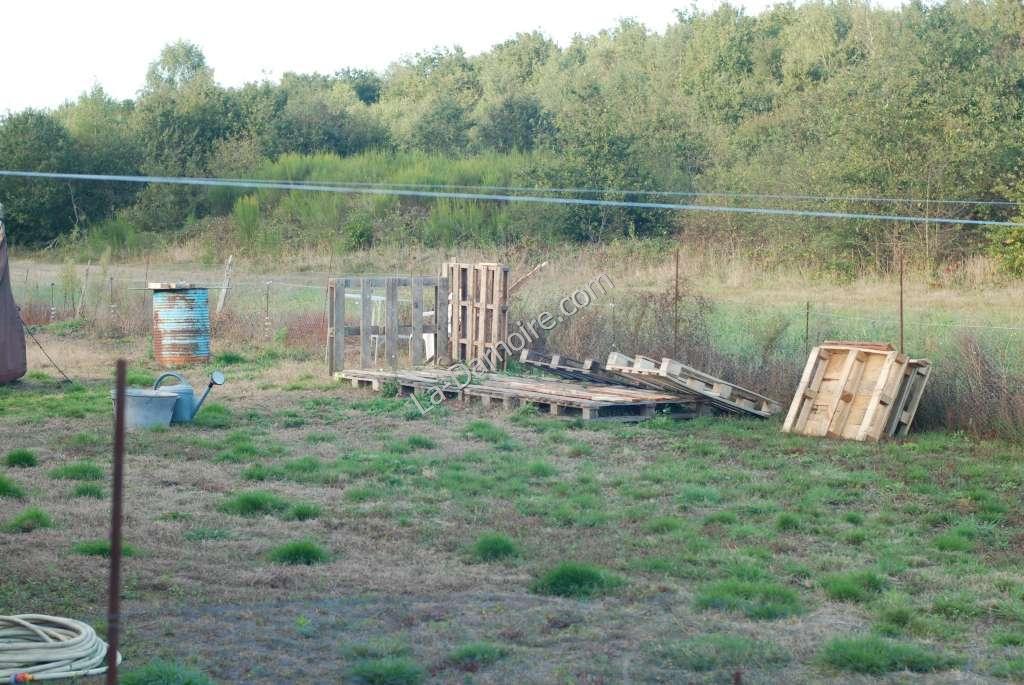
Because of the problem we experienced in sourcing sufficient numbers of pallets, our first wood store was a somewhat ramshackle affair. A couple of pallets were simply placed on the ground, and the firewood was stacked on them. The end pieces were kept in place with whatever I had handy; a wooden pole, and metal rods pushed into the soil. Some corrugated iron sheets (of which there are plenty lying around the place) provided some cover from the rain.
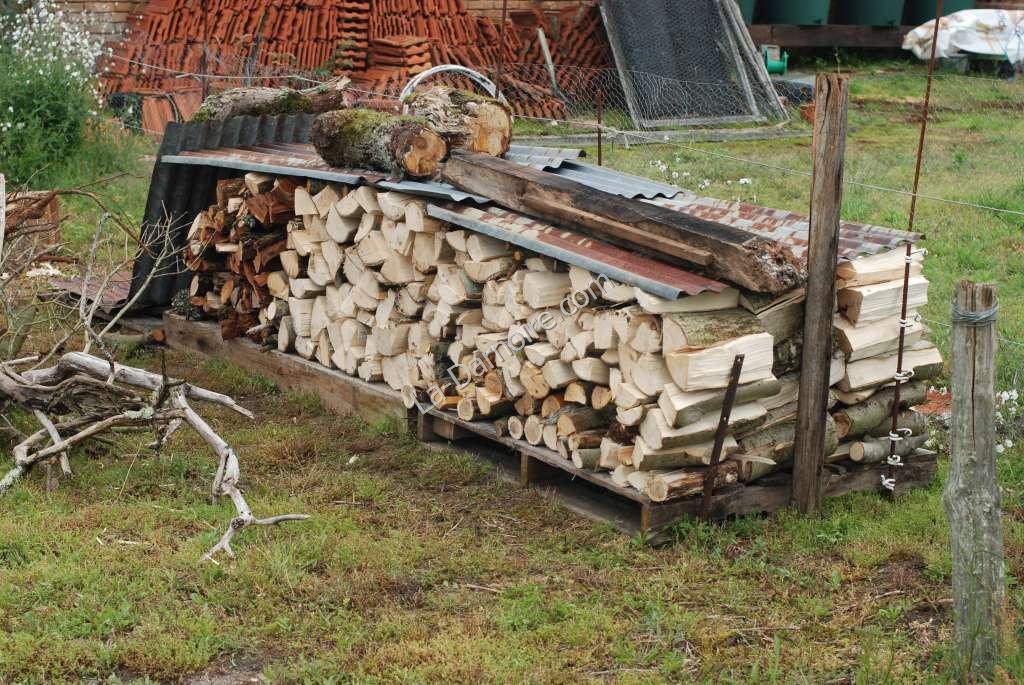
By the time we had gathered sufficient pallets to construct a proper woodshed, the temporary store looked like this:

So, having obtained the first few pallets, the construction of the actual pallet wood shed could begin. I simply laid four of them in a line, and levelled them as best I could by using some old bricks and floor tiles. Two pallets were then deconstructed with the aid of a large hammer and a pry-bar, and the resultant planks were used to join the base pallets together. I found that with firewood logs 30cm long, I could fit a total of three rows into the space I had created.
Another pallet was then up-ended, and fixed to the base at the bottom, thus forming one side of the wood shed. In the next photo you can see this side panel, and the first of the rear panels in place. The upright pallets were tied together using some of the deconstructed planks as bracing, and these were fixed in place by 4cm wood screws. Note that the old adage "Beggars can't be choosers" applied here; the pallets we obtained were not all of the same size, so it was a bit like assembling a 3-D jigsaw!
Unfortunately quite some time went by before we had sufficient pallets available to continue the construction, with the result that I neglected to take photos of the intervening stages! But once the first row of pallets was in place, a second row was added. These were tied to the first row by using bracing made from further deconstructed pallets (again secured with 4cm wood screws). Some cross-pieces were then added inside the pallets for added rigidity - these were simply the uprights of the old oak doorframes which I ripped out when installing the new double-glazed doors in the main house.

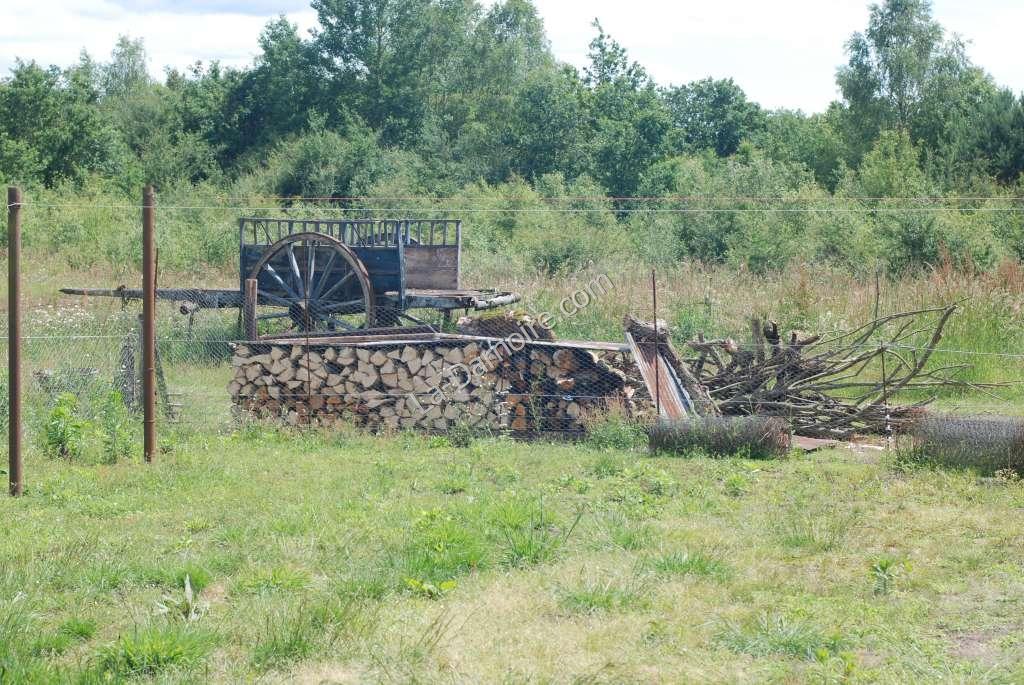
To construct the roof, I used the two shafts of an old horse-cart for the main roof lintel. (Unfortunately, although we looked everywhere, we couldn't find the rest of the cart). By joining the two shafts together in the middle, this provided a strong beam which was long enough to reach across the four pallets. I then used a reciprocating saw to trim the top of the end panels, forming a slope for the corrugated iron sheets which make up the roof. Some wooden strips were then fixed between the lintel and the rear wall, (Update:these are actually unnecessary) and the corrugated iron sheets laid on top of these. The roof sheets are held in place by 8cm woodscrews which go right through the wooden strips into the lintel and the rear wall.

As you can see, it was finished none too soon! I already had sufficient firewood cut to start the first row!
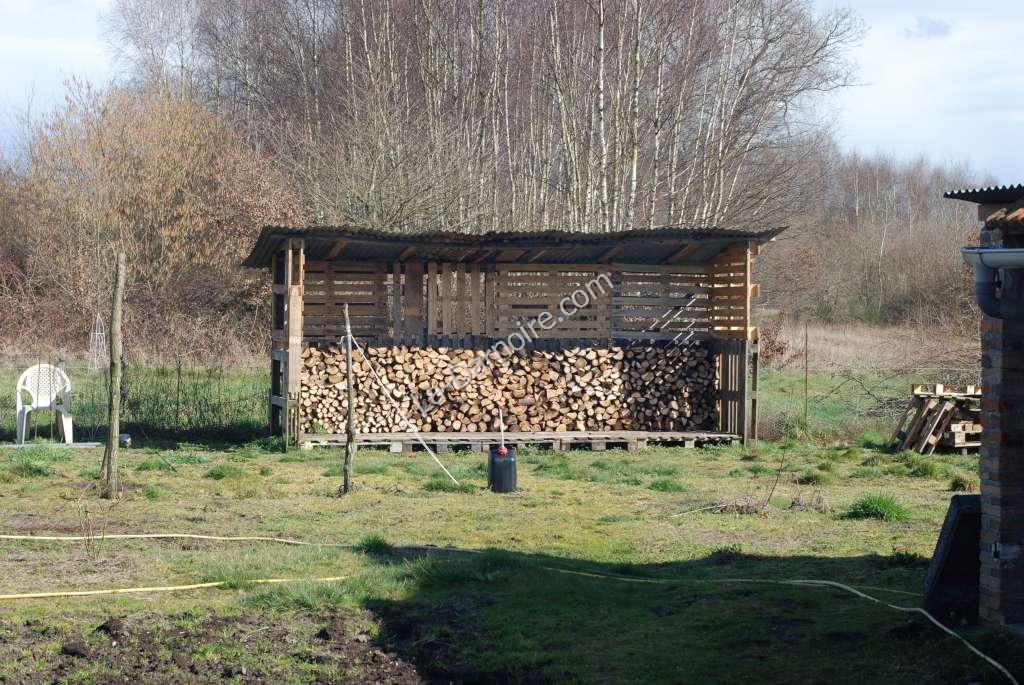
The height from the pallet base to the lintel is 1.87 metres at the front, sloping down to 1.8 metres at the rear. The length is 4.5 metres.
As it can store three stacks of firewood each 30cm long, this gives a total volume of just over 7 m 3. However, although this will probably be sufficient for one year's supply, I will be constructing a similar pallet wood shed next to the first one, so I can have a reserve supply. (And if that's not enough, I could always add a third!)
Update, 2014
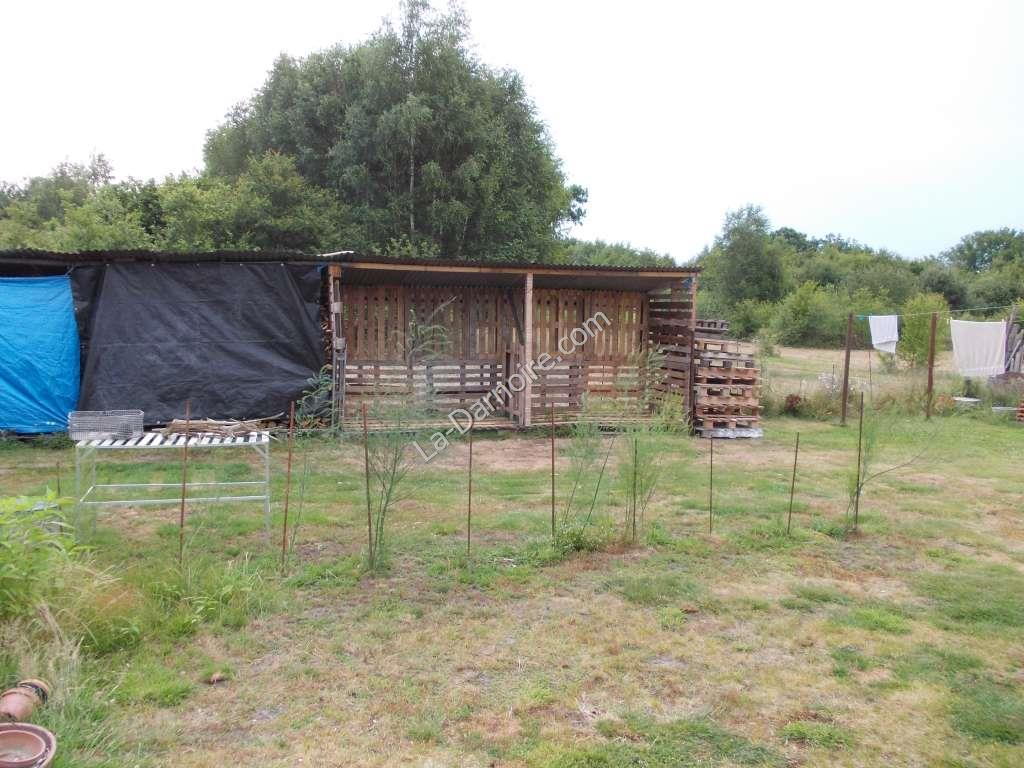
I did indeed add a second shed, and when I have sufficient pallets I will be adding a third. The firewood in the temporary wood store has now been entirely used. Here's a photo of the current wood shed:
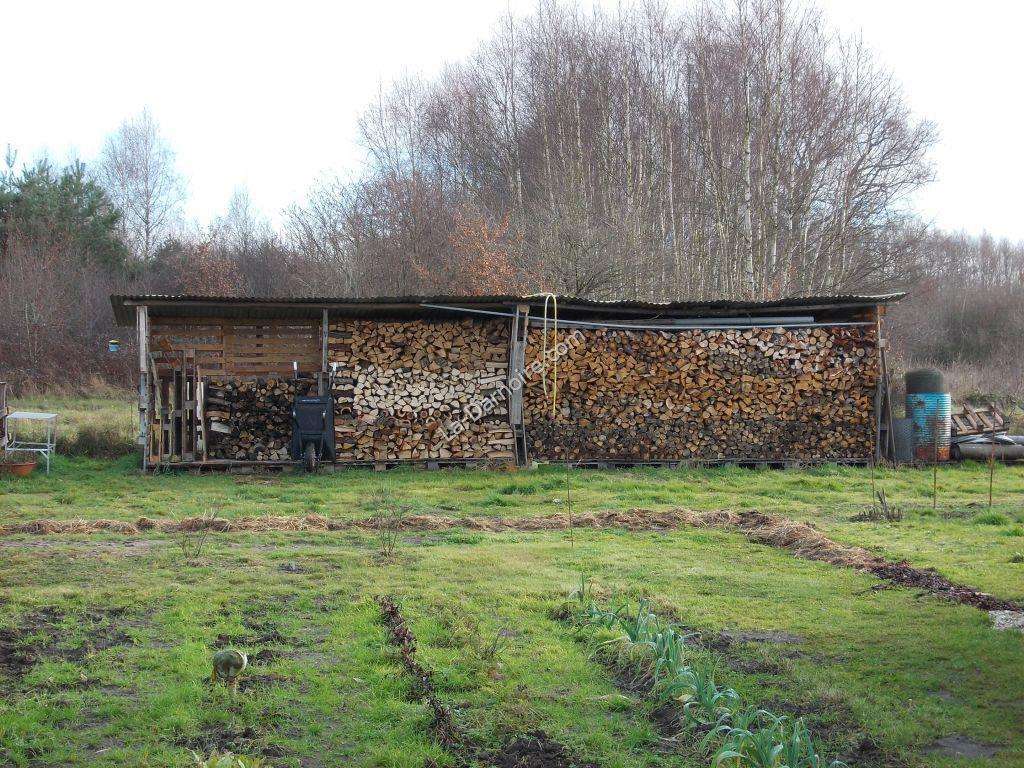
However, please note the following if you're going to construct one of these. I had no experience of stacking firewood prior to moving to La Darnoire, so it was a learning curve. I have since found that the wrong way of stacking firewood is to simply lay it all in one direction, leaning against the sides of the shed. Why is this wrong? Well, once the wood reaches head height, the pressure on the bottom rows tends to cause the pieces of firewood to want to move outwards. Obviously they can't because they are against the sides of the wood shed. So what happens is that the sides start to bow outwards. You can see this in the right-hand shed in the above photo.
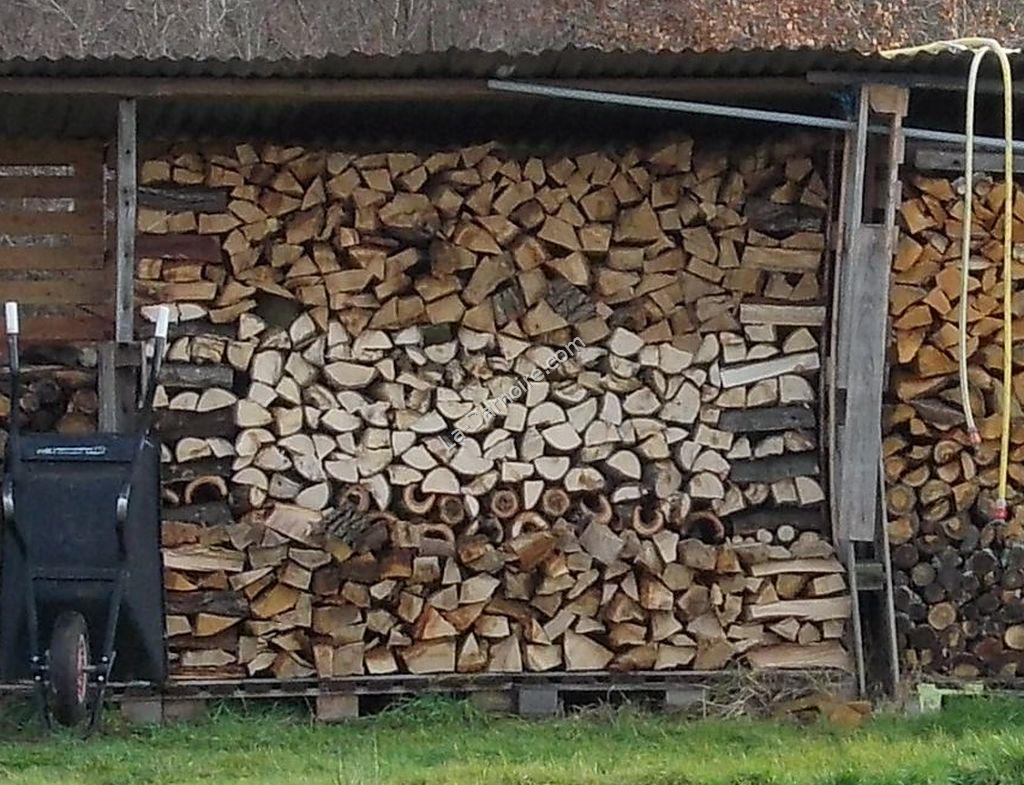
A better way to stack wood is to lay two pieces of firewood longitudinally at the end of each alternate row. Select these longitudinal pieces such that they have a very slight slope towards the inside of the woodpile. This way, the firewood only just touches the sides of the woodshed, and all the pressure from the weight of the wood is downwards and inwards. This is the way I am stacking the wood from now on; you can see what I mean in the closeup view of the left-hand shed in the next photo:
Update, 2015
I have since constructed a third shed. Each of the sheds has now been divided into two bays, as this provides better support for the roof and makes the firewood stack more manageable. Each "bay" contains 3.7 m3 of firewood, (or, if you prefer, 3.7 steres; just over 1 cord). So with the three sheds full, I have 6 cords of firewood - enough for two years' use.
As additional protection from the rain, I hung a tarpaulin on the front of each of the bays. Air can still circulate freely.
Update, 2022
We were eventually able to have a proper hangar constructed. Once this was complete, not only did we have storage space for the tractor, but all the firewood could now be stored properly under cover. Ths was done in the form of five "Holzhausen".
Next page: Holzhausen